
|
Welcome to the companion guide for my D&D Cloak Tutorial video. Here you will find some basic graphics I have made in order to assist people in creating cloaks while using my video tutorial. These cloaks are easy to make with few seams, and does not need a lot of tools, while still having that epic, majestic, fantasy feel. 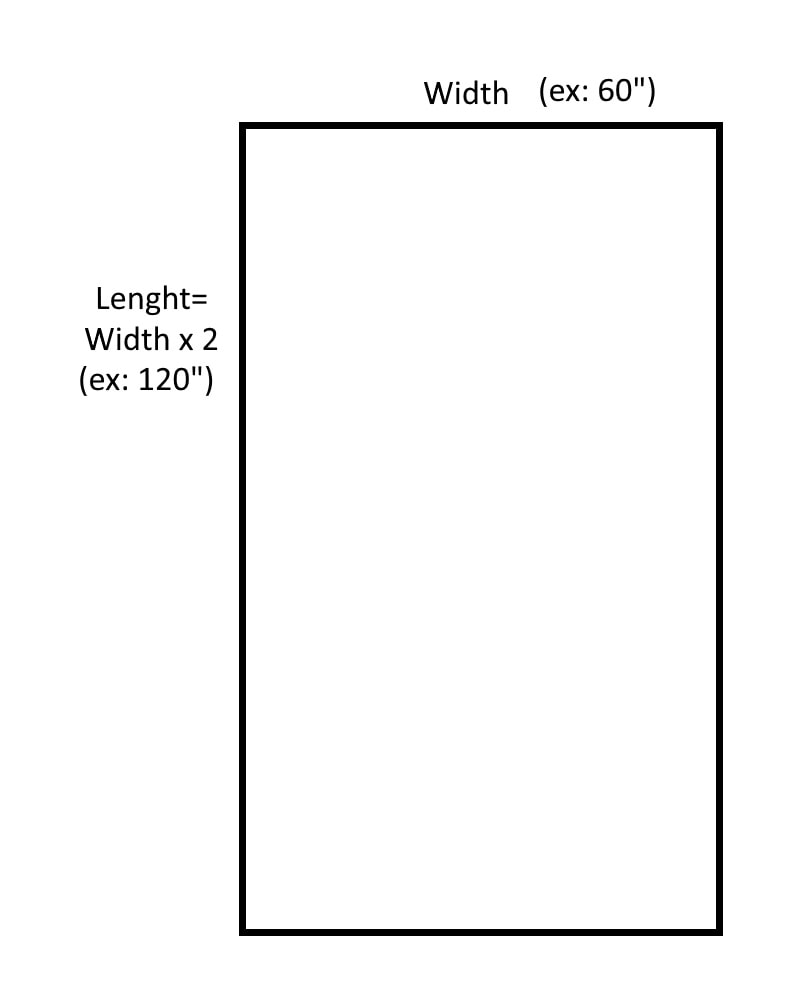 Choosing your yardage is super important and this method of creating a cloak allows you to not create any excess waste. Fabric stores sell by the length, and the width is a fixed size. When at the fabric store first you need to check the width of fabric (either marked or measure it yourself). Double that width and that is all you will need. 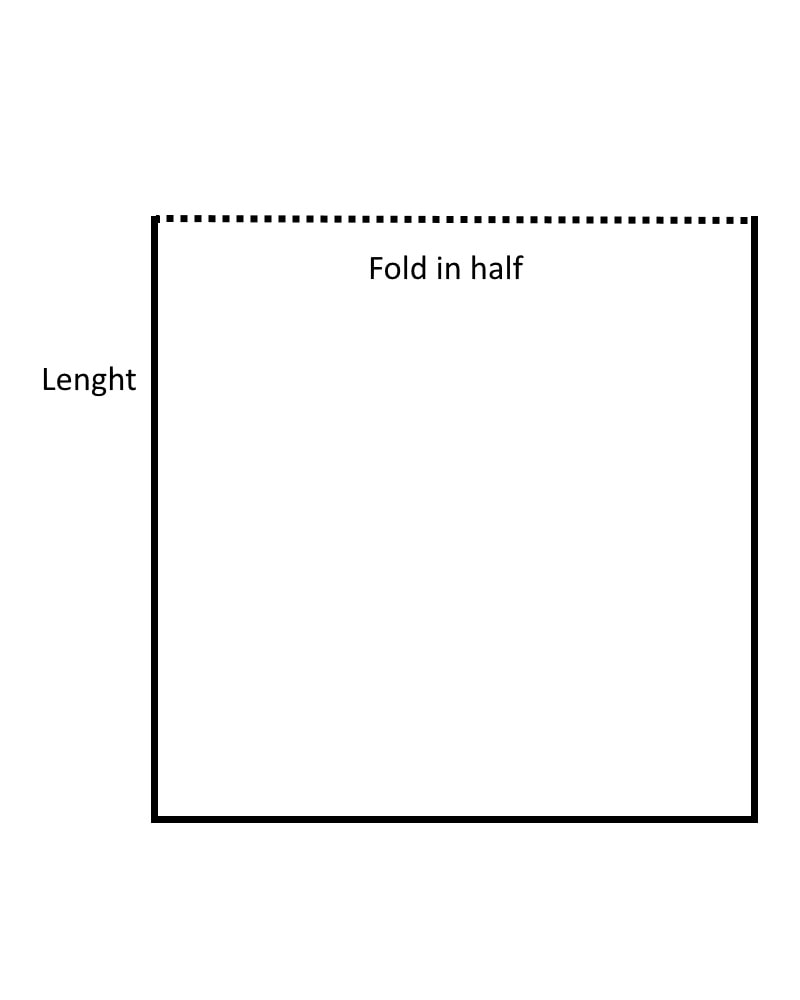 When it's time to cut out your pieces, open up your yardage and fold it in half lengthwise. Remember that most fabric stores sell fabric in half width wise, so make sure to unfold that first before folding this lengthwise. You should end up with a near perfect square (it could be slightly off depending on how that fabric was cut, that's okay). 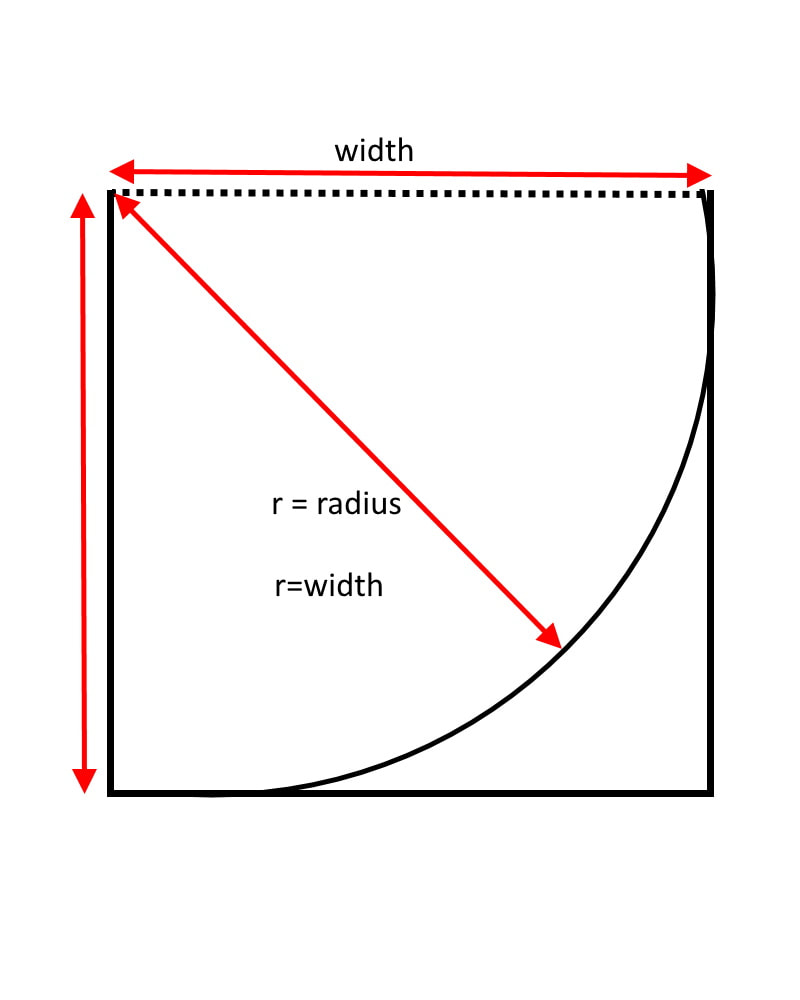 Now use your measuring tape and a pencil and/or fabric chalk to create a circle (example seen in the video). You are creating a quarter circle along the fold-line, so when you unfold it you have a half circle. The radius is the width of the fabric. 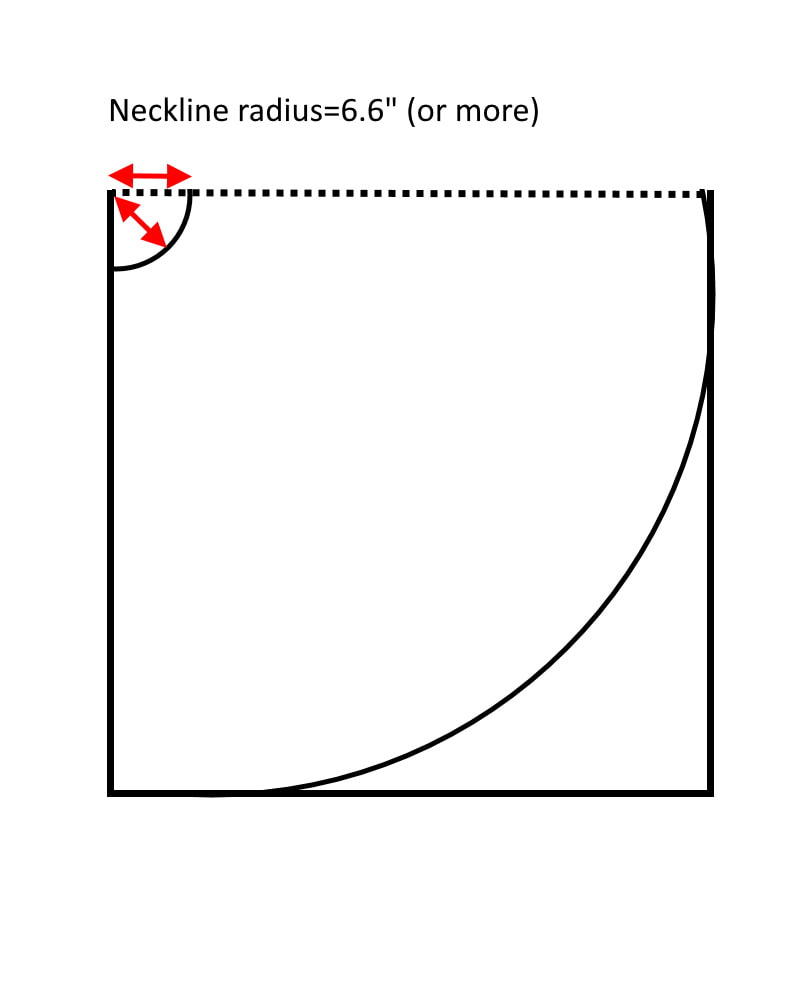 Next you need to make a neck opening on your circle. The size I use is a circle with a radius of 6.6 inches. This makes for a loose neckline of about 20 inches when it's all done. If you have a wider neck or want it looser, simply create a circle with a longer radius. Do keep in mind, the more you take off the neckline, the shorter your cloak will end up. 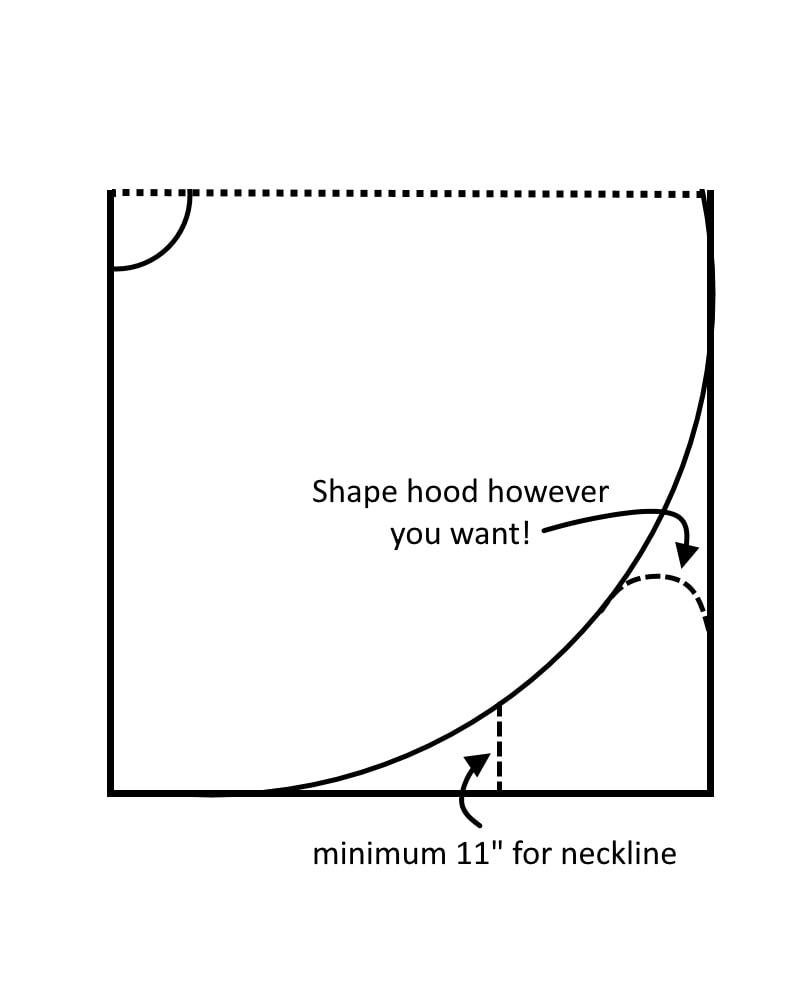 The hood is cut from the excess space! The shape as seen above is simply a suggestion but recommended for a typical fantasy cloak, but you can do a more rounded hood or even a pointed long liripipe hood. Just make sure that when you plan your hood that you cut at least 11" or more for the neckline of the hood, and that the rest of the hood is a bit larger than that. This is to be sure that the neckline of the hood and cloak from before line up. The hood neckline should minimum be the same size as the cloak neckline, or bigger as it can be pleated into the neck to add more hood volume. 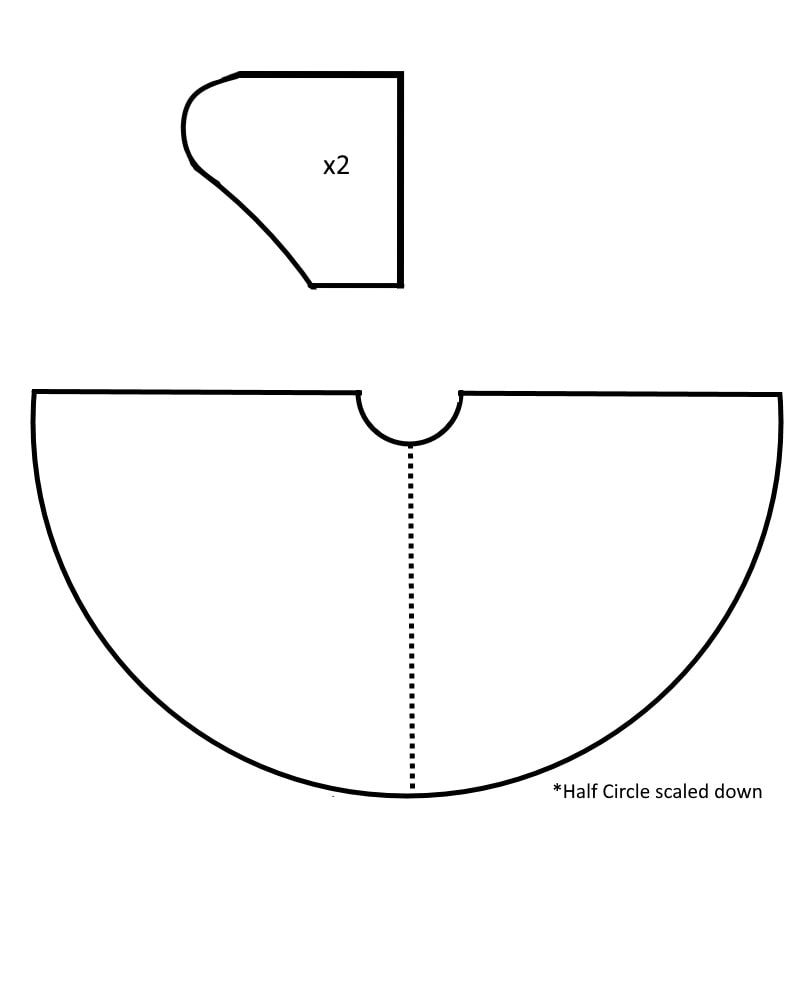 After cutting your pieces you should end up with these pieces. 1 Half Circle Cloak piece and 2 Hood pieces. 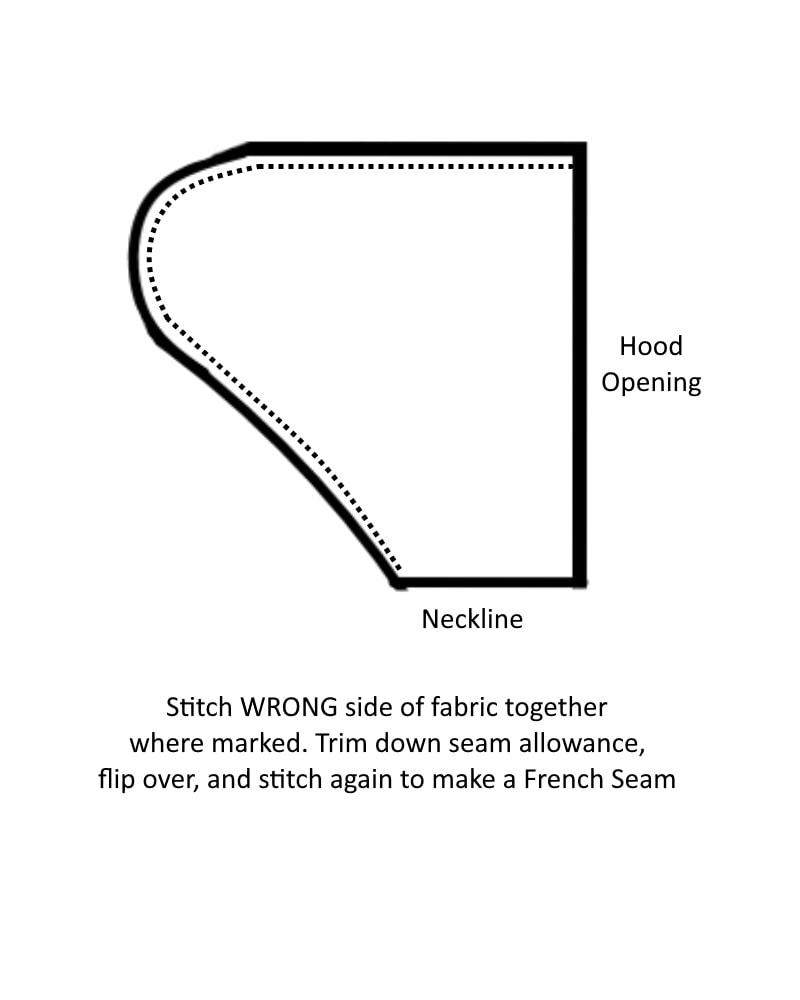 The hood needs to be french seamed in order to be finished in a way that won't fray. The total Seam Allowance should be 1/2". It you want to use other methods of finishing the seams you can also do that (overlocked, felled seams, binding, ect) but the french seam can be done by anyone even with out a serger/overlock machine. HERE is a tutorial to how to sew a french seam. You also should sew the necklines together with a french seam as well to enclose the neckline. If not this area will fray very quickly.
The rest of the sewing requires doing a basic rolled hem with a total of 1/2" seam/hem allowance and then choosing what method of closure you would like to use. I would recommend using a hook and eye/bar, a tied closure or buttons (as seen in the video).
36 Comments
|
Annie's Costume
|
 RSS Feed
