
|
Welcome to the companion guide for my D&D Cloak Tutorial video. Here you will find some basic graphics I have made in order to assist people in creating cloaks while using my video tutorial. These cloaks are easy to make with few seams, and does not need a lot of tools, while still having that epic, majestic, fantasy feel. 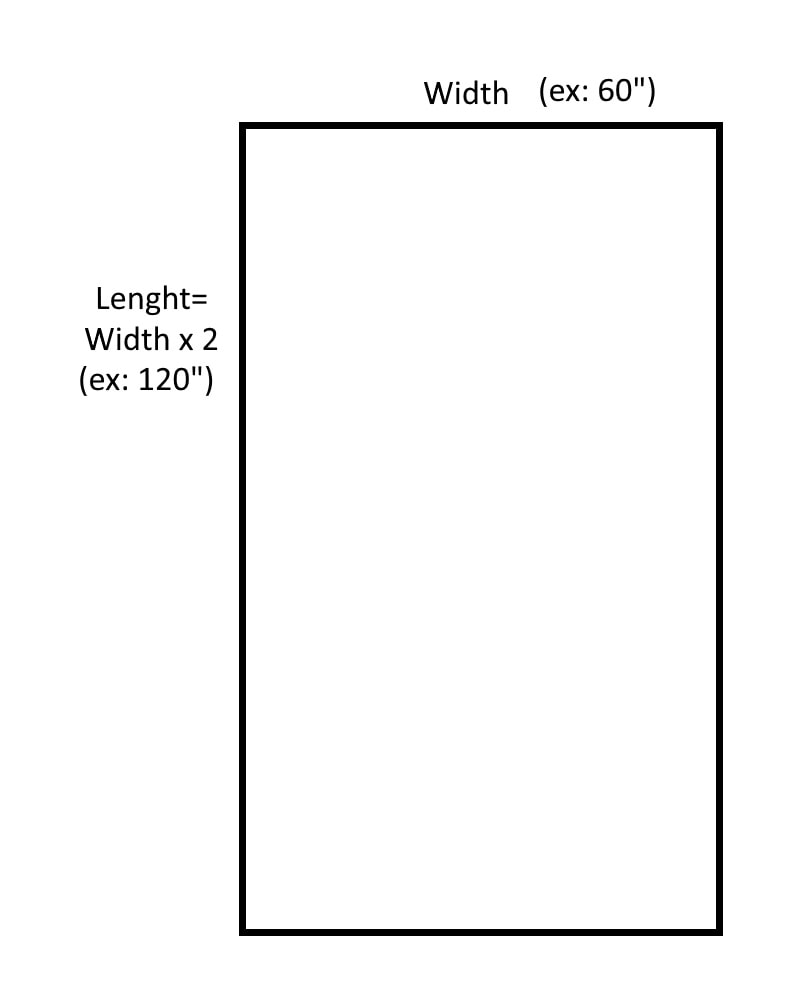 Choosing your yardage is super important and this method of creating a cloak allows you to not create any excess waste. Fabric stores sell by the length, and the width is a fixed size. When at the fabric store first you need to check the width of fabric (either marked or measure it yourself). Double that width and that is all you will need. 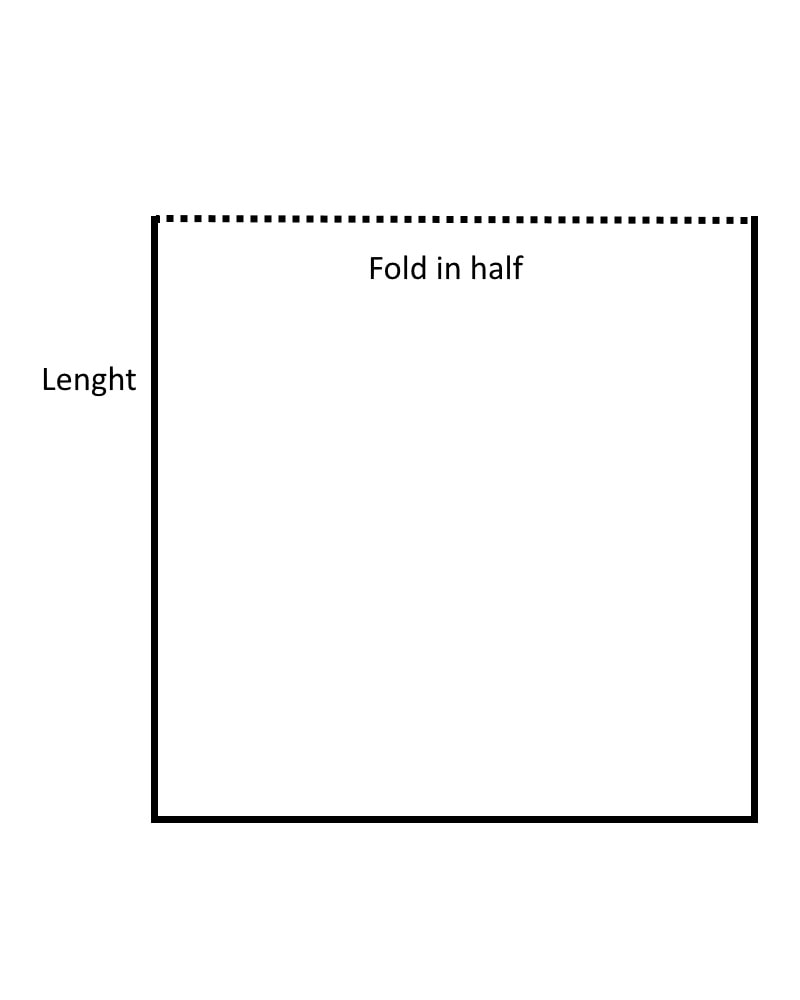 When it's time to cut out your pieces, open up your yardage and fold it in half lengthwise. Remember that most fabric stores sell fabric in half width wise, so make sure to unfold that first before folding this lengthwise. You should end up with a near perfect square (it could be slightly off depending on how that fabric was cut, that's okay). 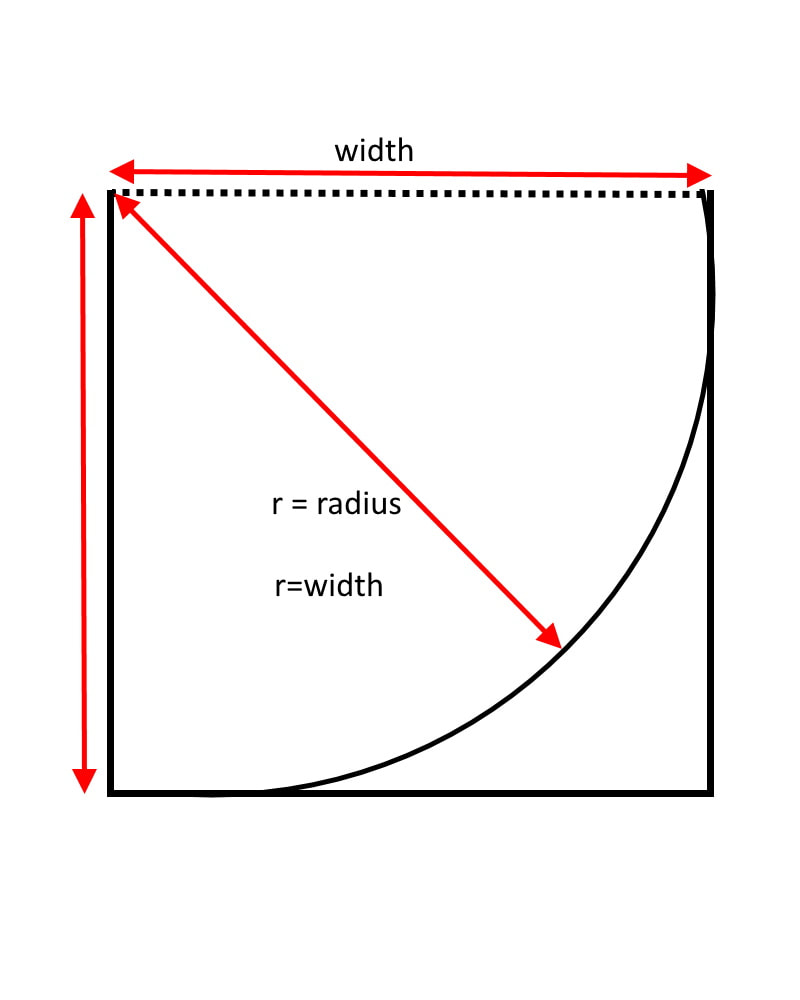 Now use your measuring tape and a pencil and/or fabric chalk to create a circle (example seen in the video). You are creating a quarter circle along the fold-line, so when you unfold it you have a half circle. The radius is the width of the fabric. 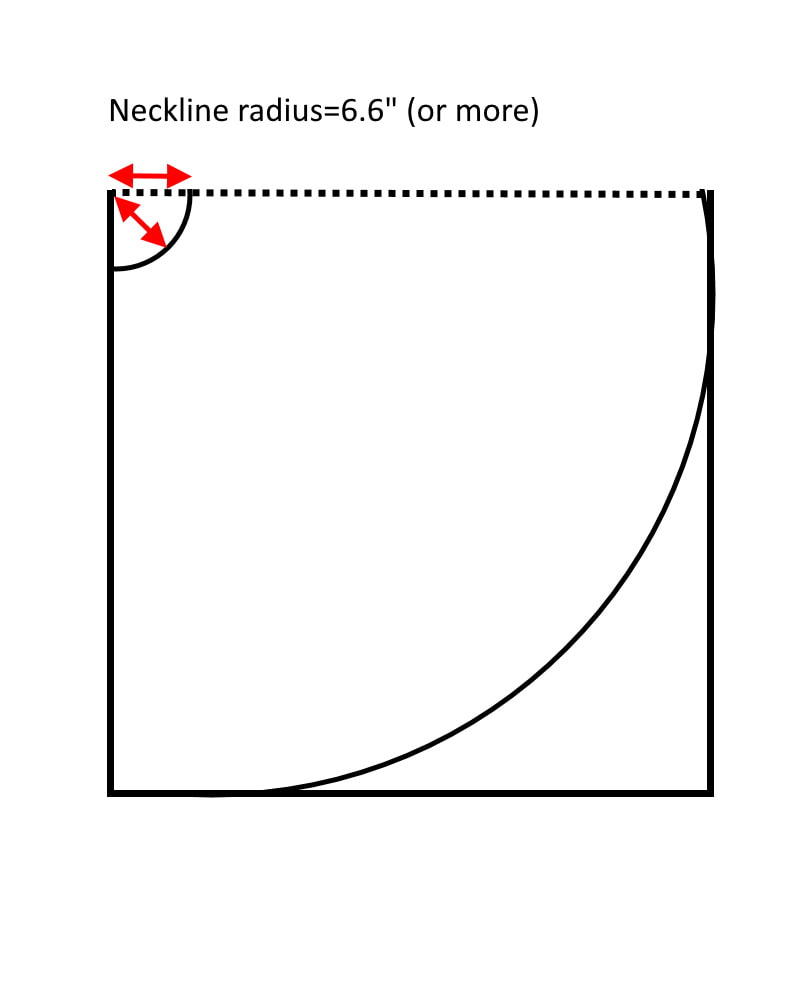 Next you need to make a neck opening on your circle. The size I use is a circle with a radius of 6.6 inches. This makes for a loose neckline of about 20 inches when it's all done. If you have a wider neck or want it looser, simply create a circle with a longer radius. Do keep in mind, the more you take off the neckline, the shorter your cloak will end up. 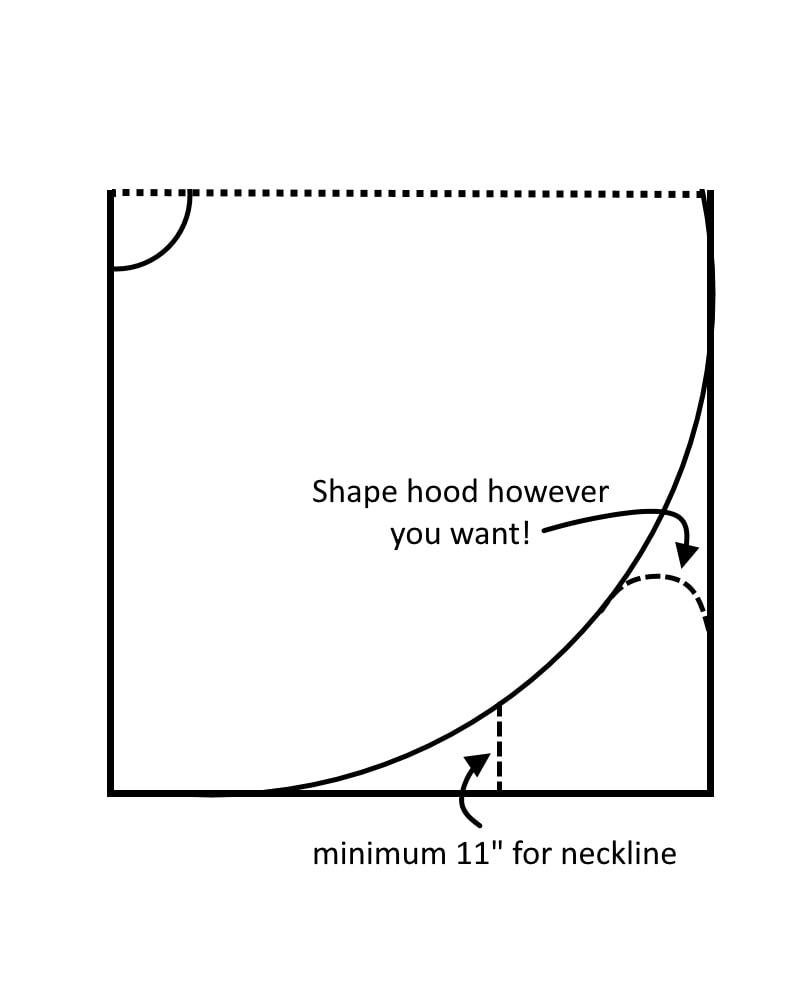 The hood is cut from the excess space! The shape as seen above is simply a suggestion but recommended for a typical fantasy cloak, but you can do a more rounded hood or even a pointed long liripipe hood. Just make sure that when you plan your hood that you cut at least 11" or more for the neckline of the hood, and that the rest of the hood is a bit larger than that. This is to be sure that the neckline of the hood and cloak from before line up. The hood neckline should minimum be the same size as the cloak neckline, or bigger as it can be pleated into the neck to add more hood volume. 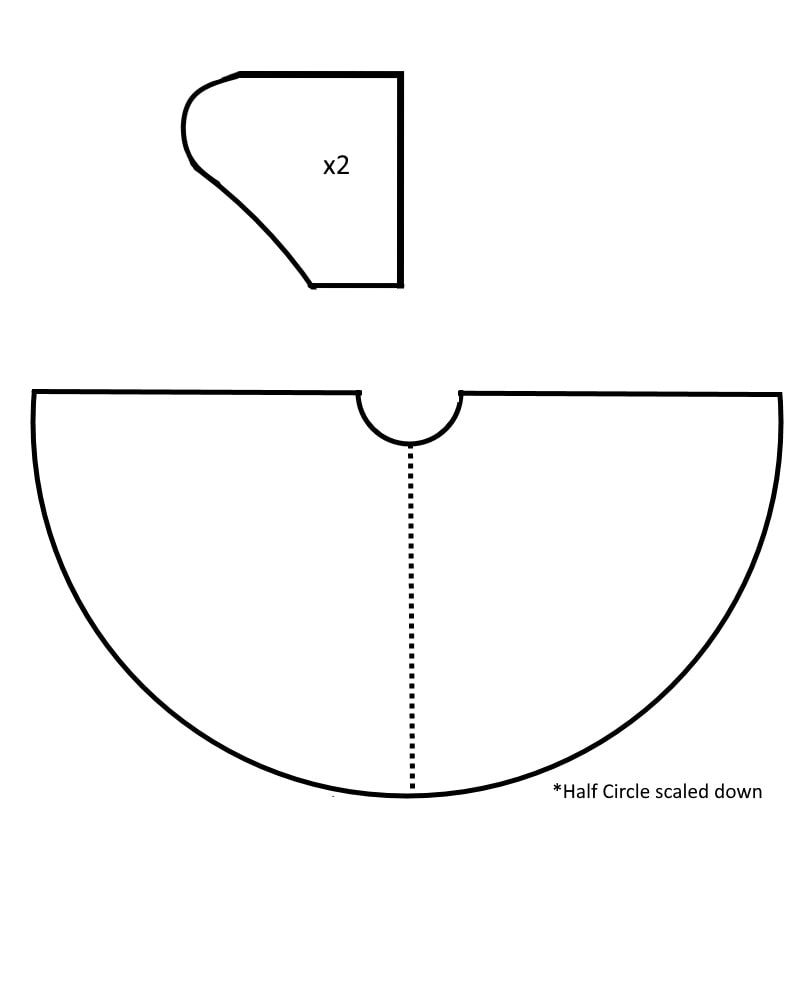 After cutting your pieces you should end up with these pieces. 1 Half Circle Cloak piece and 2 Hood pieces. 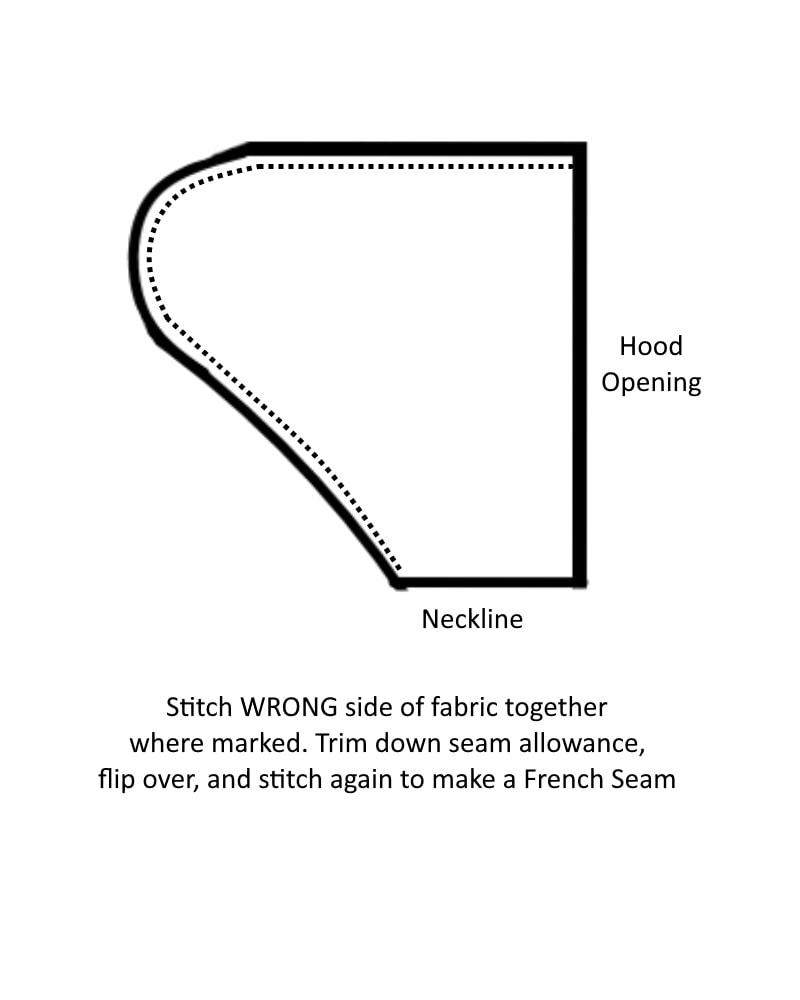 The hood needs to be french seamed in order to be finished in a way that won't fray. The total Seam Allowance should be 1/2". It you want to use other methods of finishing the seams you can also do that (overlocked, felled seams, binding, ect) but the french seam can be done by anyone even with out a serger/overlock machine. HERE is a tutorial to how to sew a french seam. You also should sew the necklines together with a french seam as well to enclose the neckline. If not this area will fray very quickly.
The rest of the sewing requires doing a basic rolled hem with a total of 1/2" seam/hem allowance and then choosing what method of closure you would like to use. I would recommend using a hook and eye/bar, a tied closure or buttons (as seen in the video).
36 Comments
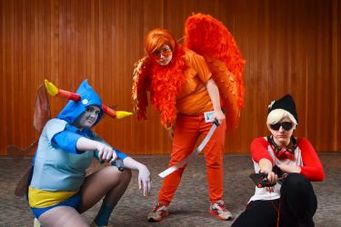
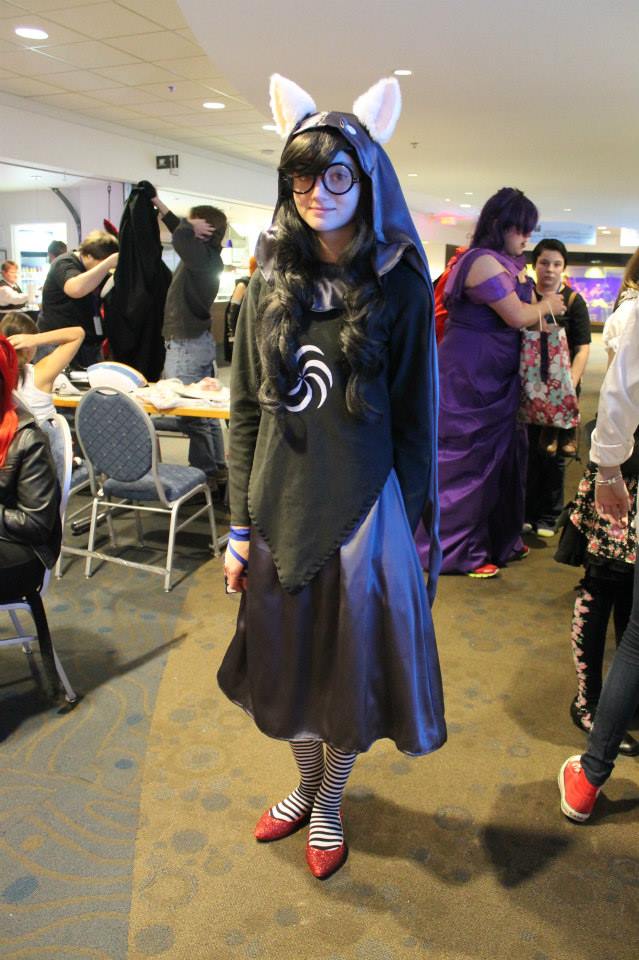
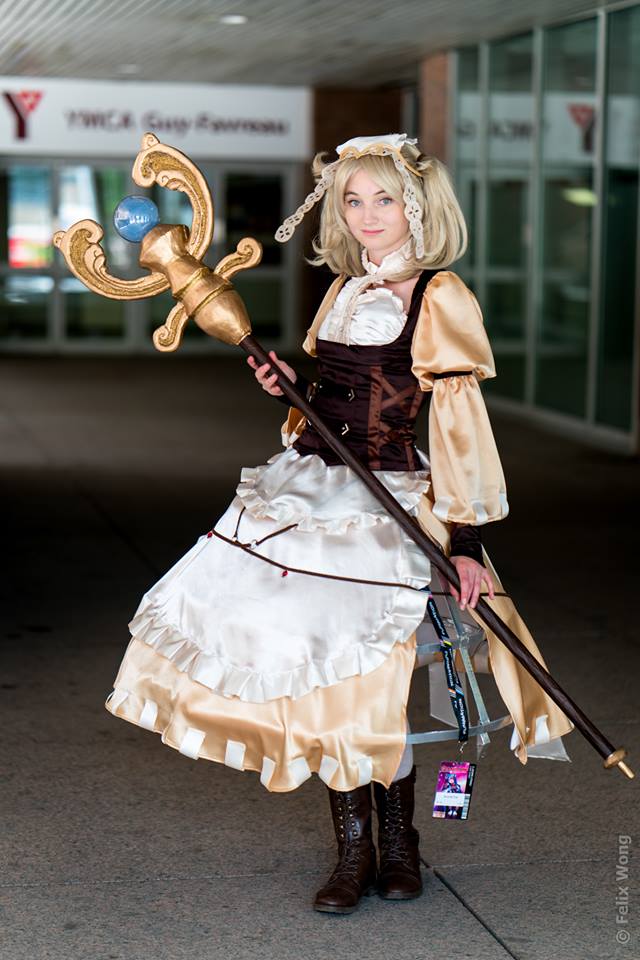
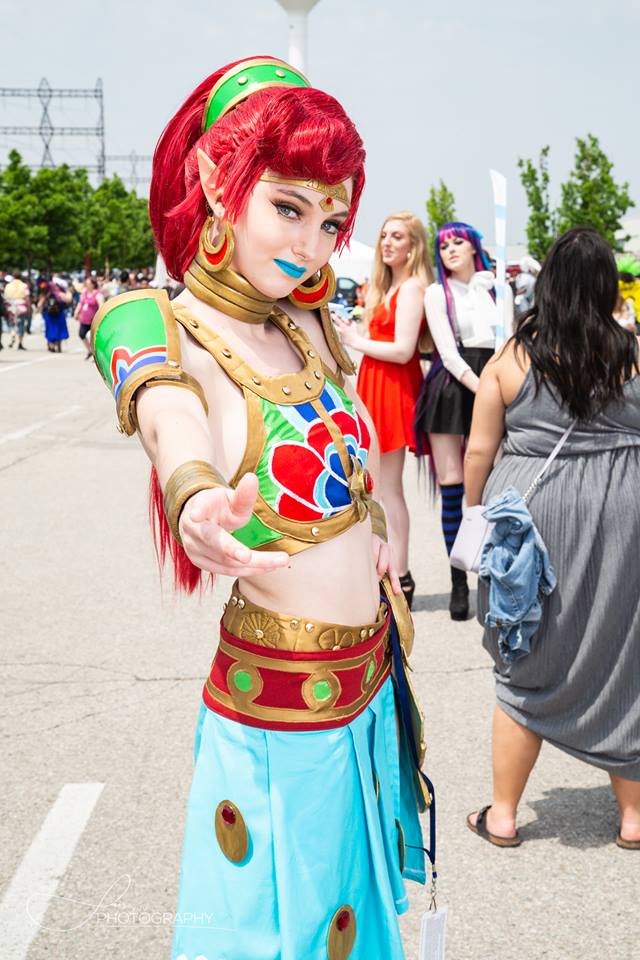
Does this title sound cheesy? Yes, yes it does. But after reading my close friend Symphony and Silk Cosplay's Blog Post from today I couldn't help but what to share my own story on how I began Cosplaying. My origin story is covered very briefly in a few interviews with the Seeker in Cornwall but I figured I would go into a bit more depth about it. I first learned about cosplay in 2009 in the same way that most people discovered it at the time, through DeviantART. I wasn't necessarily looking for cosplay but instead Legend of Zelda content, and I stumbled across a picture of Li Kovacs, (who's alias was still Pikminlink at the time) dressed as Link from Twilight Princess. Upon looking at her profile I discovered she made multiple Legend of Zelda (and other) costumes and styled herself to look just like these wonderful characters. I started to look up "cosplay" and "Legend of Zelda cosplay" and was hooked. I wanted to go to a convention and cosplay Zelda characters with my friends so badly. I was on DeviantART, Cosplay.com and Youtube constantly looking for Cosplay content.  And to no one's surprise, I also tend to cosplay a lot of Zelda characters as well! Staying true to my roots! My friends and I quickly discovered Otakuthon in Montreal and upon doing research realized that it would be completely possible for us to all go together. Then it was a matter of figuring out who we were going to cosplay. I went to my mom with my ideas and we attempted to make Princess Zelda from Twilight Princess. My mom did most of the work on the dress, but her and I did the craft foam armor and details together. In the end I wasn't very pleased with the result, especially since I couldn't get my hair to cooperate, so I switched characters realizing I should start with a less detailed costume as my first. So we found some fabric and a wig and together we made my Saria cosplay. It definitely wasn't perfect but I was so content with it, and my friends figured out everything for their cosplays, so off we went to our first convention, Otakuthon 2010 (with a parent in tow because we were all 12 and/or 13 years old). 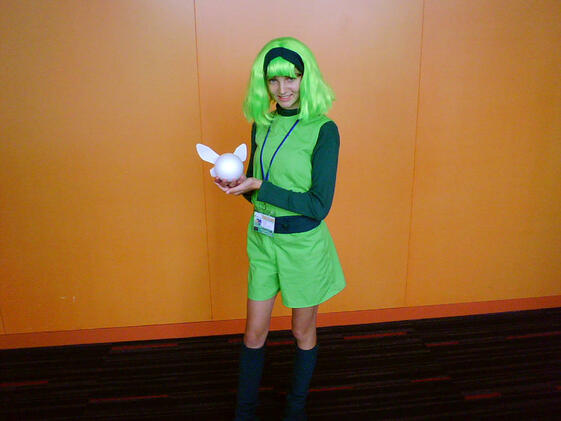 My first cosplay ever, Saria. I later completely remade this costume in 2016. Thank gosh because that party wig was not very good quality at all. From 2010 to about 2013 my friends, handful of cousins, and I would pick a new character to cosplay for Otakuthon, and sometimes G-Anime, every year. We were so in awe of the event and the cosplayers that we wanted to keep doing it. At G-Anime 2011 my cousin suggested we go watch the Masquerade and I had no idea what they meant but they said it would be fun so I went along. What I discovered was something I would want to do for years before actually taking part. I laughed so much at the skits, was in awe of so many costumes and I found myself wanting to be good enough at making costumes on my own to show off my work on stage. This was some of the motivation that pushed me to eventually compete for myself, even though I had NO IDEA it was even a competition until a while later. In 2013 I finally decided I would start to take cosplaying a bit more seriously than I had been before (when my mom was making 1 costume per year for me with some of my help) and started to regularly make my own costumes with only some help from my mom compared to before when she made nearly everything. I was about 16 when I made this choice and am I ever glad I did. I was regularly working on several costumes per year, always a new one on the go, and I was really enjoying it. So much so that I thought it was about time to enter a masquerade like I had always dreamed of. 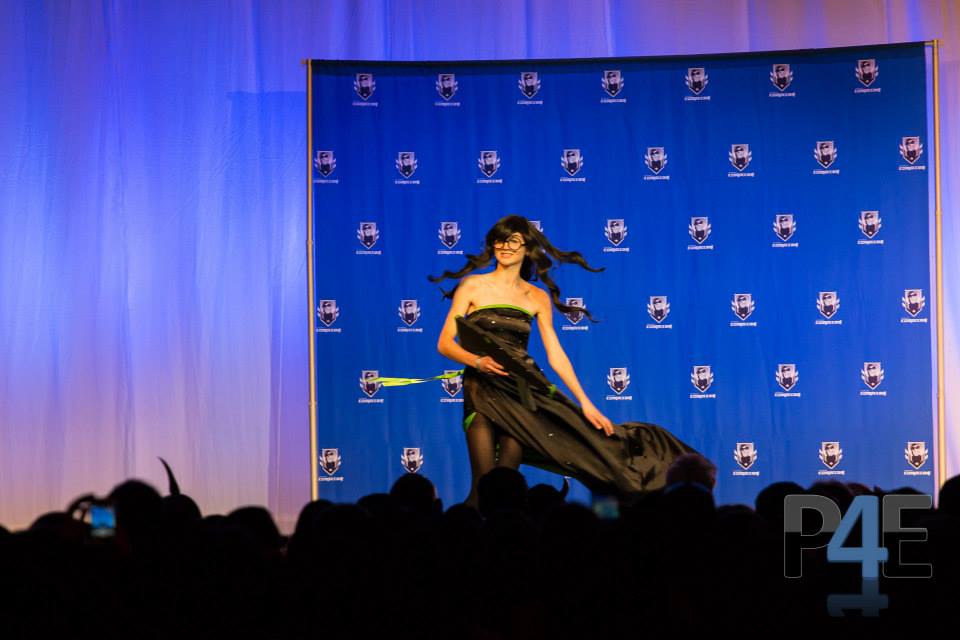 Photo from my first Masquerade at Ottawa Comic Con 2014 - by Pose4Effect Photography Ottawa Comic Con was still decently new at the time so I decided I would enter the masquerade with my 3AM Jade Harley cosplay at the 2014 edition, which was just before my 17th birthday. Looking back on it, it wasn't a very good costume compared to my current work. There was no structure or fitting done to it at all, but I was so happy with the final look and so proud of all the hand sequencing I had done on the costume. I didn't end up placing anything but considering my anxiety levels at the time, and how badly I had wanted to try a masquerade, it was an absolute win in my books. I started to enter them regularly, loving meeting new people and learning new things from them. I credit Masquerades as part of the reason I improved in quality of craftsmanship while I was in high school, as the improvements were quite fast when I look back on it. Masquerades pushed me to do my best and learn more and more. It took me several masquerades, several cons, before I won anything solid, but just before my 19th birthday I won my final Artisan Award that placed me in the Master Division, at the same convention I started competing at masquerades at. And just before my 20th I reached Master Internationally at Anime North. 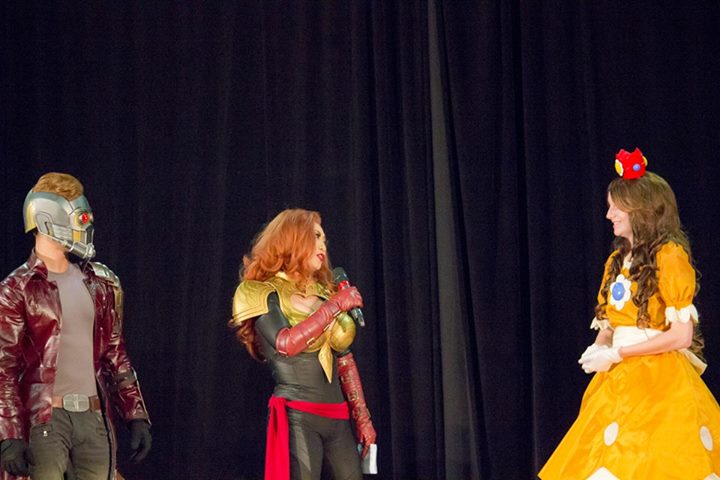 During my third Masquerade, Ottawa Pop Expo 2014 I got one of Yaya Han and Johnny Junkers Judge's picks! The first time I had gotten anything during a masquerade Masquerades are also the reason I got so interested in the construction of garments and sewing in general. Before cosplay was just "make it so it's recognizable, it doesn't need to be good or technical" and suddenly I wanted to make everything technically accurate, fit things properly, structure them, and just learn as much as I could about sewing and creating. Cosplay is the reason I ended up studying Fashion Design at Fanshawe College, which I graduated from in 2018, and I am currently completing my Post Graduate in Technical Costume Production as well. Upon entering college in 2015 I realized I had a lot to learn, and my knowledge in sewing and garment design sky rocketed due to the classes I was taking, and for the most part I was enjoying them. I genuinely enjoy sewing and pattern drafting and most other skills involved i garment construction from scratch The skills I picked up also transferred into my cosplay skills, naturally, and is also part of the reason my costume quality improved so quickly. Looking at costumes I made before college to now there is a such a major difference in quality, and also a difference in how much I enjoy making costumes. I absolutely love it! I also love looking back on the past few years of my schooling since the difference in costume quality is so obvious. It makes me feel very confident in my abilities and it makes me look forward to what is next on my cosplay journey.
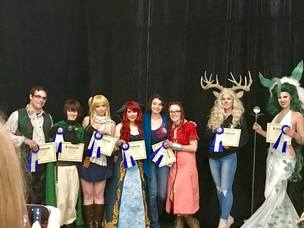
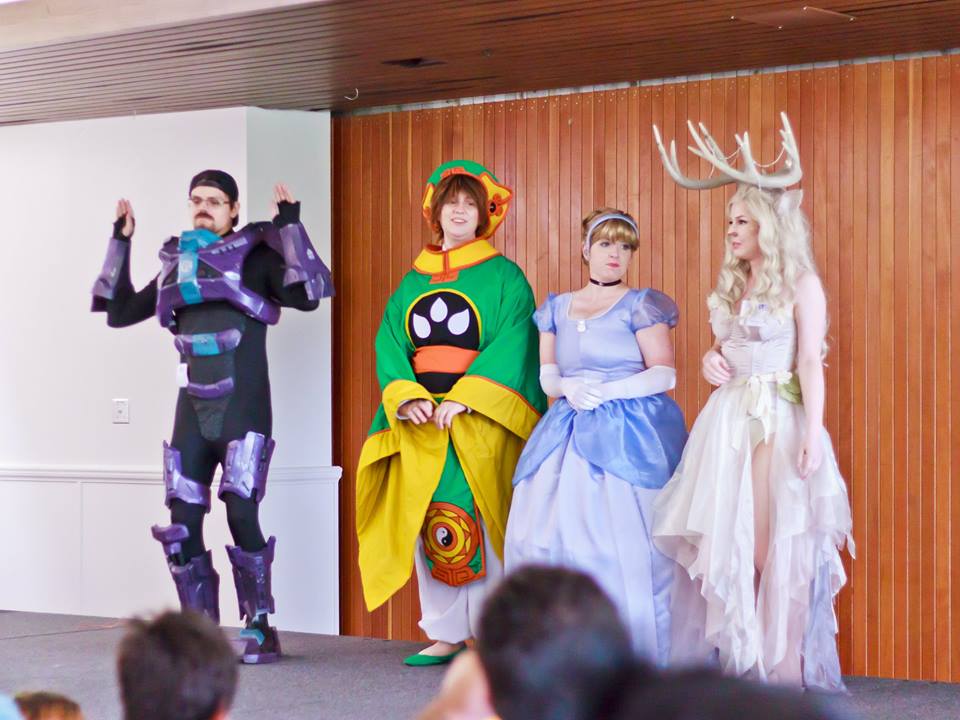
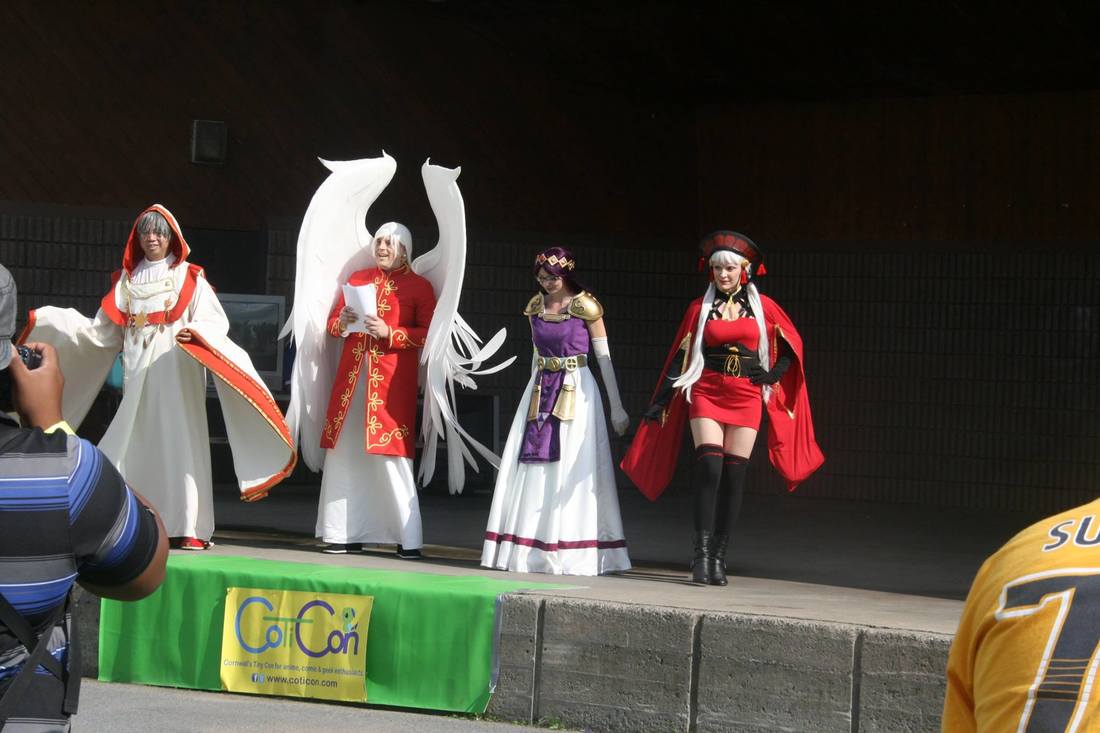
Hall shots of some of my costumes per year in order: 2013, 2014, 2015, 2016, 2018 and 2018 If you would have told me when I was 13 years old that I would be making several costumes per year, entering masquerades (and sometimes even placing!!) and having an amazing group of cosplayers to call friends, I probably wouldn't have believed you. I never thought I would be here, and I had a pretty vivid imagination and was an a massive day dreamer. The short long of it is, we all start somewhere. We were all that geeky kid who wanted to try cosplaying at some point whether it was in your teens or twenties. Keep practicing, keep learning, and keep on dreaming and motivating yourself and who knows what awesome places you will end up in. I have been participating in ICG Cosplay Masquerades regularly for over four years and they are a subject I have been wanting to talk about for quite some time. I personally am rather passionate about these competitions, and it may be because I have been taking part in them since I was fairly young, but there is a lot of positive experiences that have come along with taking part in them. I recently asked a bunch of my friends, who are avid Masquerade participants, judges, staff or fans, about their reasons for enjoying and regularly participating and we came up with quite a lot of reasons which I wish to summarize and share with all of you. Before I discuss some of the wonderful aspects of competing in masquerades, one may be asking; what IS a Cosplay Masquerade? A Masquerade in the Cosplay World is a workmanship and performance competition for cosplayers that takes place at most conventions. For a competition to be called a "Masquerade" it usually follows the International Costumers Guild (ICG) Guidelines. In Canada these competitions have a few categories costume makers can compete in: Young Fan, Novice, Journeyman, Artisan and Master. Besides the Young Fan division, competitors compete for workmanship or performance (or combined) awards in their division (or overall) and follow a point system to essentially "level up" to the next competition level. Awards are given out based on demonstrated techniques, skill level and other such things. If you'd like to learn more about the ICG guidelines you can find them HERE. I would highly suggest giving it a read if you are wondering how Masquerades work as it can be very confusing when you are just starting out, and of course check out each conventions own set of rules since the ICG's are simply guidelines and each convention has it's own set of unique rules. 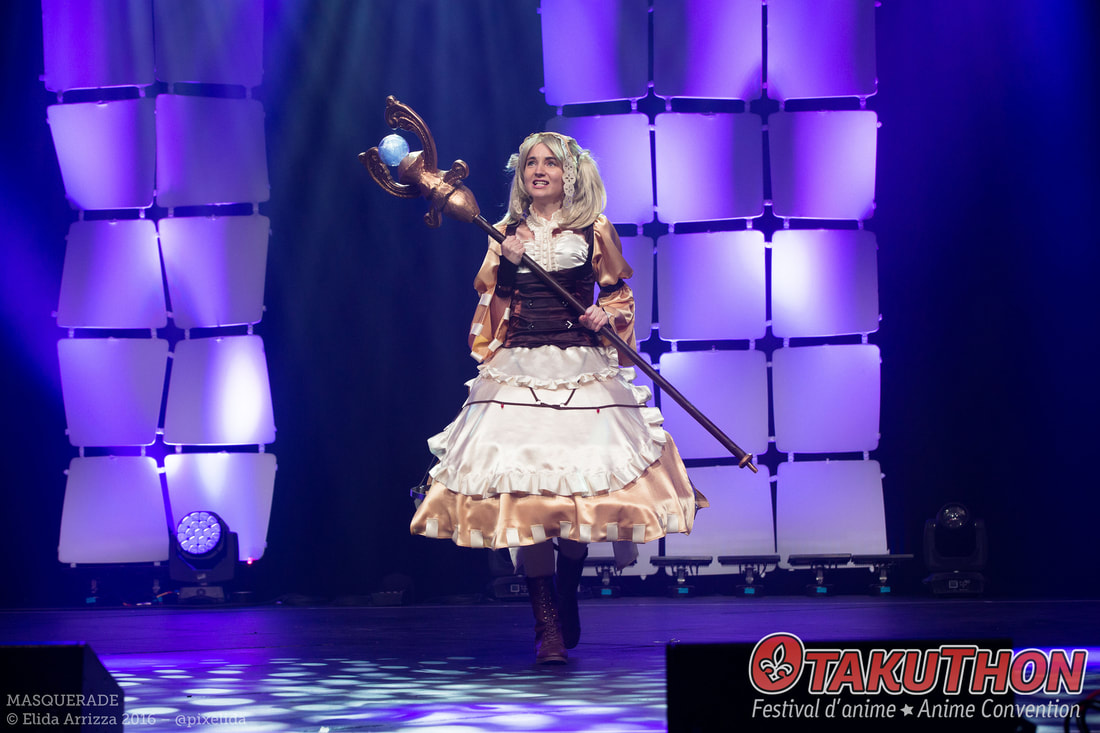 Now, let's talk about how my peers and I replied about what we enjoy about masquerades: Workmanship:
Performance/Stage:
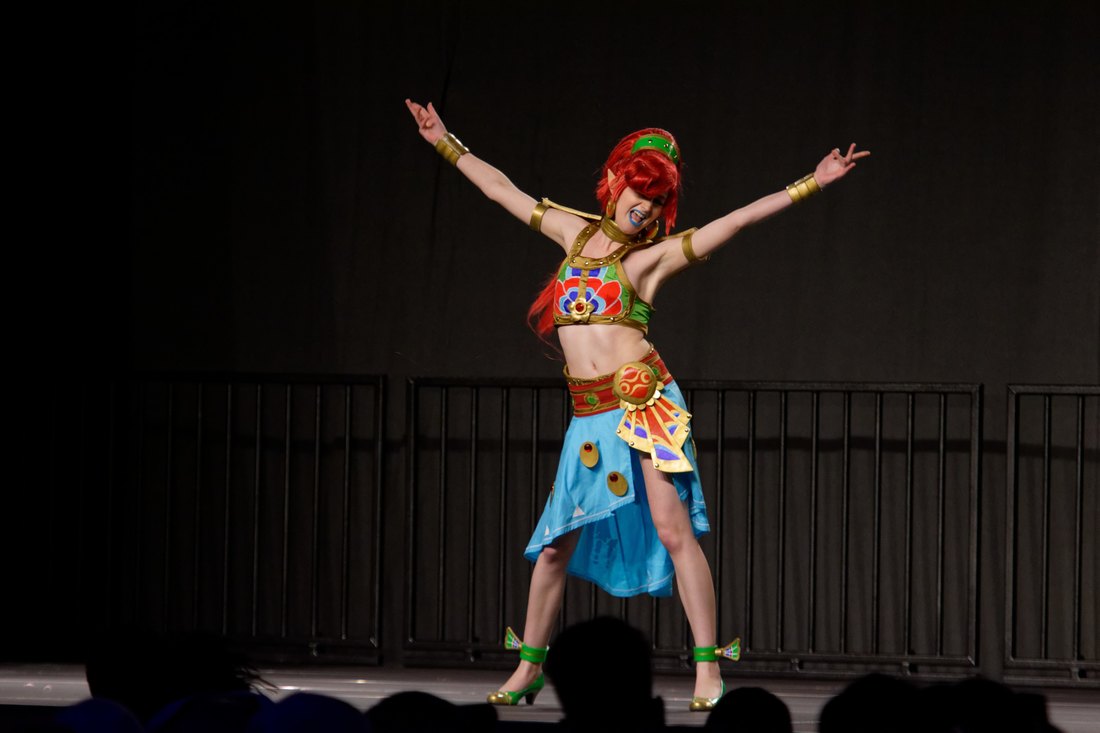
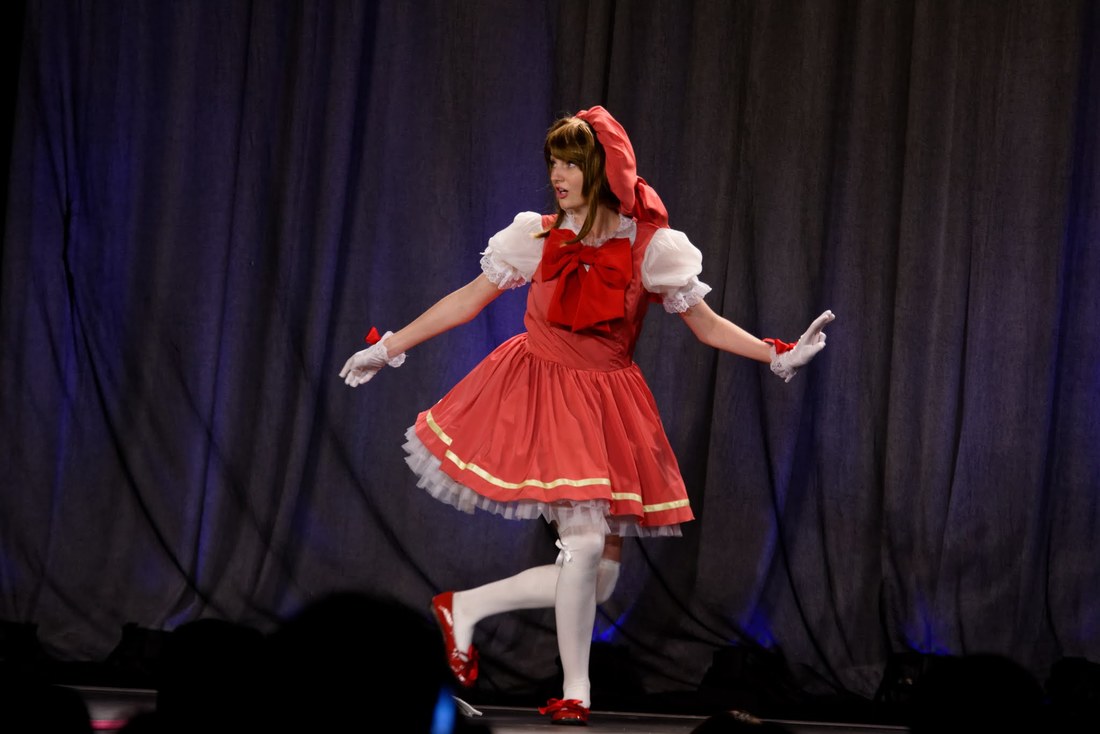
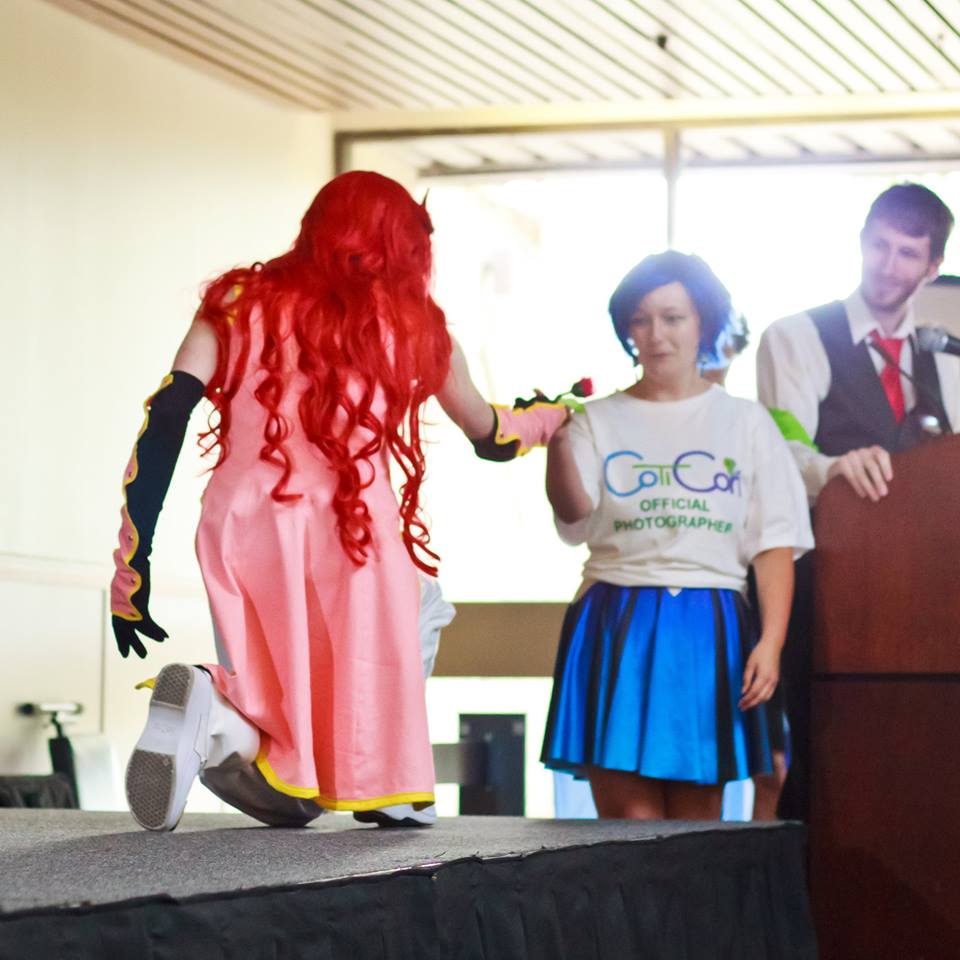
Some pictures from a few of my Masquerade Performances The Backstage:
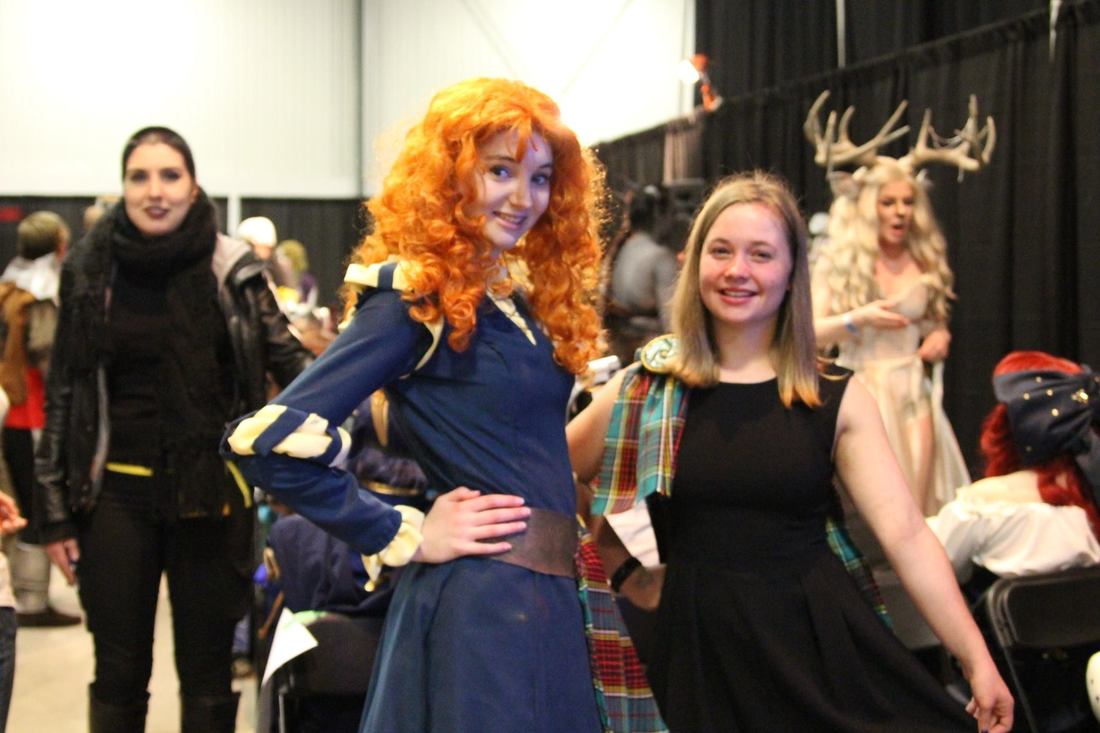
Photos from some Masquerades I have competed in; one being from backstage and one from awards with the friends I was participating with The BEST part over all though; the friends and the fun! Some of my best convention and cosplay experiences have happened during the green room time during masquerades, and most of my closest friends are people I have met from the Masquerade community. I have no idea where I would be as a cosplayer, and how different my life would be without these friends so I am VERY thankful to masquerades for being the reason I met these fabulous people. Masquerades are also personally something that drives my work. It's not the awards that does it for me, it's the fun. It's the fun of going on stage with a skit I have prepared. It's the fun of hanging out with new and old friends backstage. It's the fun of pushing myself to create a new costume to impress the judges. It's the over all fun of cosplaying in a setting that is supportive and fair. If Masquerades were a poor experience for me I would not do them, yet I find myself drawn to them year after year, con after con. If winning was what it was all about for most masquerade regulars I doubt they would be competing at the level they are today. You don't win them all, and it takes a while to start winning some titles (it took me about 4 masquerades before my first award), but really everyone wins just based on the experience alone. The people you meet, the creativity you learn about and the entire experience is the real prize in the end.
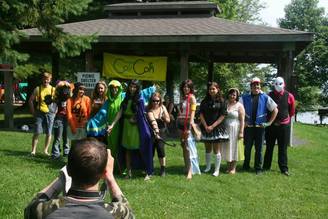
Cheesiness and realness aside, I would like to know; do you compete in Masquerades? What drives you to do so? What are your favourite aspects of them? Annie's experiences of starting and organizing CoTiCon! This is a subject I have been wanting to discuss for quite some time. Now in light of me announcing that CoTiCon is no longer happening due to life not allowing it, and the online discussion about the disaster that was 'Tanacon', it seems like an opportune time to discuss just how much goes into organizing a convention. For those unaware, in 2014 I was part of a program called "Summer company", where students would submit detailed business plans and if accepted would be given funding from the government to learn and run a business. I decided I wanted to bring a geek convention to Cornwall Ontario, even if I was only 16 years old at the time I started it. Was this a bad idea? No, I would not say it was even if others thought so. I learnt so much and it led me to noticing so many things about the way conventions are organized.
 Target Audience: The first thing I had to do to plan out CoTiCon was figure out my target audience. A lot of people would over look this and say "well my target audience is anyone who is nerdy!" , but that doesn't necessarily work. It is very difficult to please everyone, especially on a first run. My target audience were people between 15 years to 25 years old. Cornwall had a large enough population in this age group, and not enough events for them to justify this decision. Of course any age could and did attend, it is not just this age group that the event attracted. But having that target allowed me to research what that population was interested in, or wanted, and plan from there. I realized that from what I had seen that there had a lot of interest in anime and gaming, so I decided most of my events, panels, ect would cater to that. This worked well as most attendees in the first year were in fact fans of anime and video games. Having a basis of what audience I was catering to made it easier for myself to plan as I then had a focus of what to plan around. 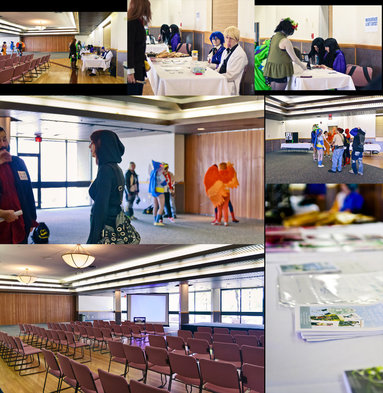 Target Size and Venue: Once target audience was figured out it was onto target SIZE. I knew that as an anxious 17 year old I would not be able to run an event that was for thousands of people, and as a first con it would be next to impossible, so I had to think realistically. With my budget, small town and target audience in mind I decided to aim for a small but fun event at 100 people, with a 200 people maximum. This was helpful when it came to renting my venue, The Cornwall Civic Complex. Having a number in mind helped me decide how much of the space to rent so I would not go over budget but still have enough space. I was able to rent the largest room, the hall and one of the smaller rooms and this was perfect for my ideas for main events, panels and gaming tournaments. During the first year I had a lot less time than I would have wanted to plan the event (3 months), but this was due to the time frame of Summer Company, so I was limited on picking a date that the Complex was available. This time frame was fine considering the small scale of my event but it caused a lot of issues I could have avoided without the time constraints. That particular year CoTiCon was the same weekend as FanExpo, which I would have wanted to avoid but due to target audience, but avoiding Otakuthon weekend was far more important as it was hardly two weekends before, and it took place in city closer to Cornwall. Usually the date would be set a year in advance and away from other convention weekends. When selecting a date organizers should be very aware of what conventions are going on in nearby cities, and if that will take away from your potential attendees. Keep in mind how similar events are (who are they catered to) and if another event may take away from yours if it's at the same time. Preferably, to run an event that is as smooth as possible, you want to start planning as SOON as possible. You want at LEAST a year for planning and several months for daily planning at least. CoTiCon was at the end of the summer every year so I could use my summers off to spend more time organizing. During school months I would still be focusing on the event and figuring out details. It was a lot of work. As mentioned in the intro you do not want to be like "Tanacon", an event by a youtuber where she decided to run an event on the same weekend as Vidcon, and only had two months to plan a 5,000 attendee convention. If you've read my advice prior you can see why I am mentioning this. The time frame was too small for such a large event and caused a lot of issues during, such as securing a venue that was big enough, and so many other things. I am sure many of you have heard of this before but if interested in the details, you can read about this event HERE or watch Shane Dawson's Video covering the suject with the Tanacon creators , and remember some of it's downfalls if you ever consider running your own event. Please note that I genuinely feel bad for the Tanacon organizers as they are individuals who are my age, but also with their time frame and attitudes this was very likely to happen. Moral of the story; don't take on more than you can handle if running an event. Keep attendees and venue sizes in mind and think realistically.  Naming: Once this was established and researched I finally named the convention. This step can be harder than you'd think, and most people jump into this as the first step for their event, but you really should not! The name should be thought about while planning but not set in stone until after the target audience and such is figured out. I wanted to make sure it was something UNIQUE, CLEVER and would get the aim of the event across, which was a small event for geeky individuals. While brainstorming some ideas a friend of mine suggested "CoTiCon" since it could represent "Cornwall's Tiny Con", it sounded catchy and memorable, but it was also unique while also echoing small events like Quinte Mini Con. Naming an event is important as you don't want to name it something too generic as it may get lost among other convention advertisements, or a name can be off putting to people that could potentially be attendees. I felt CoTiCon fit and went with that! From there my mother and I designed the logo, which is just as important as this would be the image associated with the event and all advertising. The colours are fun and bright but also reflect the City of Cornwall logo colours. We also decided to create two cute mascots similar to anime convention mascots. CoTiCon's were a forest elf girl and a bird, both in the colours mentioned previously and both to represent the forestry industry that existed in Cornwall in the past because of Domtar. The bird mascot, Coco, sits on our logo to help make it more memorable. 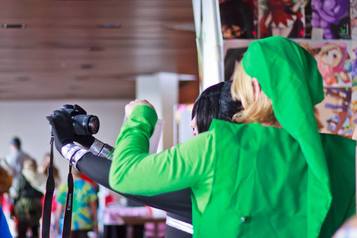 Vendors and Attendees: Before you can start advertising for attendees and vendors you must figure out how much it costs for them to be there. This is usually decided from looking at the venue and other costs as well as your target size. How many vendors can you fit into your space comfortably? How many people do you think will attend? What is a cost that is worthwhile for vendors compared to the projected amount of attendees? Vendors will not buy a booth space if they don't think they will either break even or make more than the booth cost, which is important to keep in mind. During the first year we had about 10, and for a fair price as we could not grantee sales due to a small crowd (the final CoTiCon had about 40 vendors, for an even fair-er price and most vendors made much better sales with the larger crowd). The same goes for attendees, they will not buy an expensive ticket for a low quality event, so everything has to be well balanced. Unfortunately for the first year CoTicon's tickets were more expensive than hoped due to the venue cost and expecting 100 people versus the 155 we had, our tickets were about $25 even for such a small event. Due to that we were able to lower attendee prices for the following years especially since it doubled the following year. For the size of our event in future years, the most ideal price was $15 per attendee and vendor prices varied depending on the amount of vendors we allowed. Figuring out fair but also realistic prices for tickets and vendors can be tricky. You don't want unfair prices that will scare people away, but as a business one has to break even and preferably make money to run future events. 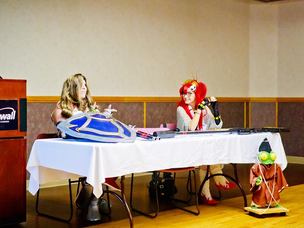 Guests, Panels, Events: Once everything else was established I was left with planning the rest of the convention. I had quite a bit of my budget remaining after venue so that is where I decided on guests and panels, in that order. As a con i wanted to bring in guests that would add value to my event, preferably to do panels and perhaps attract people to the event. During my first year I had a VERY small budget for guests but luckily knew of some cosplayers who would gladly guest without guest fees, and very little for travel so I was very lucky. Cosplay guests are what i focused on for CoTiCon as cosplay was a subject I covered a lot at the event (as cosplay is popular in all geek mediums and was gaining popularity in Cornwall area). We would occasionally have other guests as well, like in 2015 we had voice actor Geoff Allan attend and teach attendees about voice acting and even did some REALLY neat demonstrations and games during his panel. Guests and panels can be one and the same while in planning stages. As a convention I wanted it to have neat things going on so bringing in guests who could host neat panels and cover cool topics was key. Once guests were decided upon and contacted we would plan out what panels they would cover (often a Q&A style panel was in the line up) and for cosplayers, if they would judge our masquerade. Left over spaces were then opened up to the public if they wanted to host panels in the left over time slots. The convention was always one day and had at LEAST 6 panels depending on the year. One of our panel highlights over the years was with our guest MNC Prop's amazing interactive Armor Making Workshop, where attendees paid a small fee to take part in making some armor pieces with the master himself and they would have pieces to take home. Those who participated loved the chance to learn hands on. Some photos of former guests/masquerade judges taken at CoTiCon events, final photo by CoTiCon staff 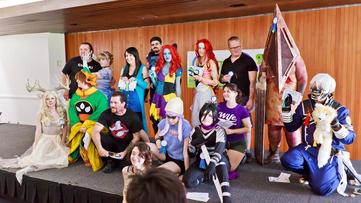 Other things hosted at former CoTiCon events were also quite important as well. As mentioned before, the masquerade was a great way to get Cosplay Guests involved in a bigger way and also attract cosplayers and cool costumes. We were lucky enough in the last few CoTicons to have Saso from Montreal run a proper ICG Masquerade for us, with all divisions and the point system. He ran some amazing masquerades and was honestly such a key piece of the staff. A masquerade is great because it gives cosplayers something to be excited and motivated for, helps convince them to bring fancier costumes and is also a show for those who just want to watch. Due to us having the ICG system in place it was also great practice for those who were scared of larger masquerades and also a way to get VERY good feedback from judge's one-on-one. Other popular events included our gaming room. Luckily in my case I knew some EXPERTS in Super Smash Brother's tournaments...okay it was maybe a best friend of mine from high school. My friend Eric ran daily tournaments during high school so one year I approached him to see if he would volunteer to run a few tournaments for CoTiCon events. He happily accepted and not only ran tournaments AT the convention in the gaming room but also helped me run a mini event during Christmas Break one year. This was how he acquired some of his mandatory high school volunteer hours and I also may have given him a surprise cash thank-you as well due to his efforts. Both the individuals mentioned who ran these events added so much more value to such a small event. Which is also a point to say that staff and choosing staff can be very important. Some attendees would show up only for the tournament or only for the masquerade. Events like these can be important to running a very interactive event, which was my aim for CoTiCon. Other events I ran at coTiCon over the years included fun themed games (Pokemon hunt, Zelda game in "Amazing Race Style" ect) and also would do my best to bring in people to do small performances. I got a local talent to perform a geeky piano medley for everyone during the final year and he was quite the hit due to his abilities on the piano. Convention events can be very creative and can add so much unique-ness to a convention.
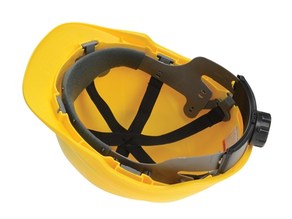
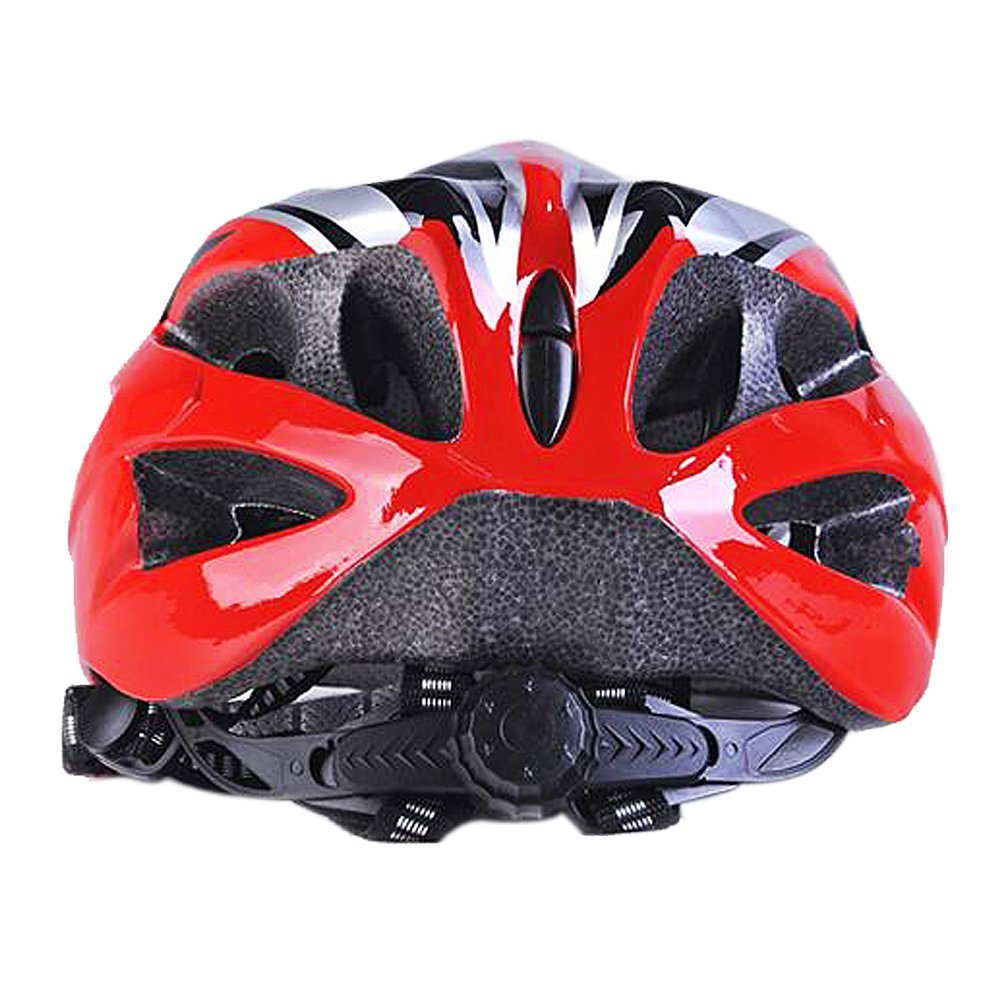
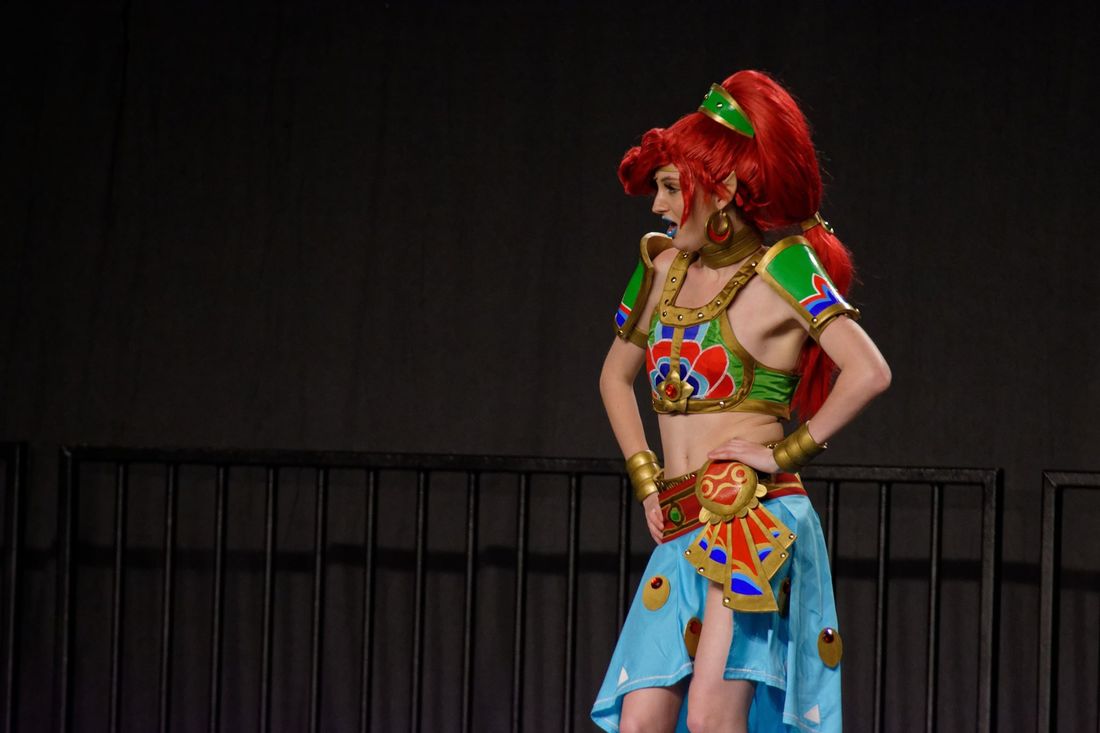
Some snapshots from CoTiCon 2016's Masquerade The final thing I would like to discuss is just how much went on besides all of the before mentioned topics. As mentioned before this was basically my full time job for one summer and part time for the rest (although I was still spending full-time-job-time on it when not working a regular job). Every day there would be e-mails, social media and other inquiries to work with. New questions being asked, new vendors to list, more information to share and add onto spreadsheets and such. Kinks were being ironed out all the time. Newspapers were contacted, banking was done and budgets were constantly being worked around for advertising. There was so much daily problem solving and interactions taking place. This entire experience of running CoTiCon and even it's mini events helped me learn SO MUCH. So if you are considering running a convention in the future, maybe my experiences that I have shared above can help you out. Perhaps it will instead teach you how much goes into a convention, even a small one that had about 400+ attendees in it's largest year. In the end I am thankful for everything I learnt, and everyone who supported me and the convention. There were so many ups and downs and harder times involved, but having a supportive cosplay community helped me to put on something fun for people every year, which was the goal in the end anyways. The event evolved so much year to year, even with the catering to cosplayers more than anything. I am just glad people enjoyed it as much as they did. Big thank you to Henrickson for allowing me use of his photos. almost all the photos used in this blog were taken by him over the past few years 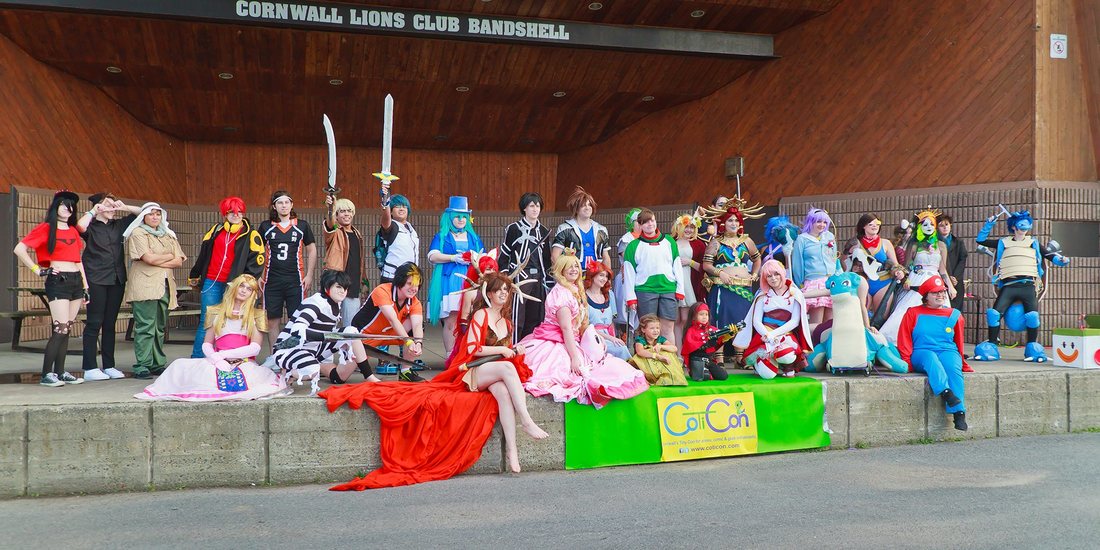 Anyone who has tried wearing a pony-tail styled wig will tell you the same thing- they are a pain (sometimes too literally). Even the best of the best such as Arda Wig's Jasmine style will want to slip off your head due to the weight. No amount of wig clips were helping.Now there are a lot of good tutorials out there, such as Arda Wig's Detachable Pony Tail tutorial (which I referenced a lot while creating my Urbosa wig) but there is one issue with the proposed structure it suggests; it is one size and remains that size. When looking for tutorials all of them suggested a similar structure, made of worbla or heck even metal, both things that I could not afford to use nor couldn't get to stay in place anyways. With my budget and time limitations it led me to realize the proposed structure looked like the inside structure of a safety helmet/hard hat.
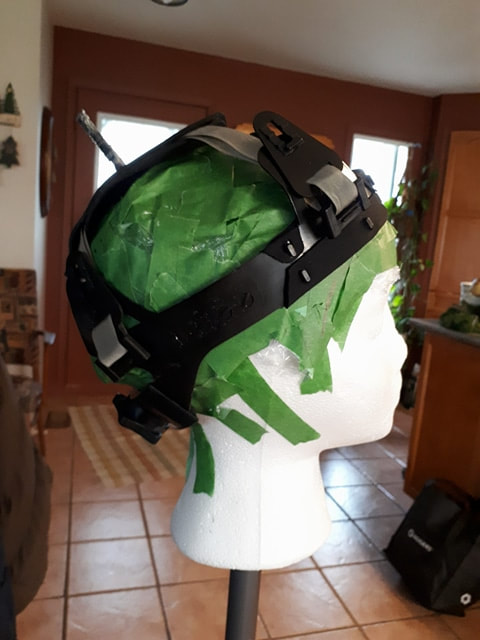
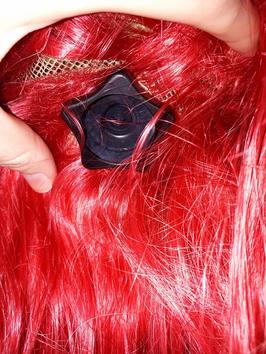
The adjustable structure, and some bike helmets also feature the same type of adjustable frame Luckily in my case my father used to work in industries that involved him owning a few hard hats, so he gave me one so I could tear out the structure inside it. First I tried it on to make sure it could adjust down to my head's size, and it did. Next I added a long, thick screw through the criss-cross at the top of it, and sandwiched this area between some craft foam to keep the screw in place as well as so the head of the screw would not hurt my head while I wore the wig. This screw would later be what I created the pony-tail "nub" around.
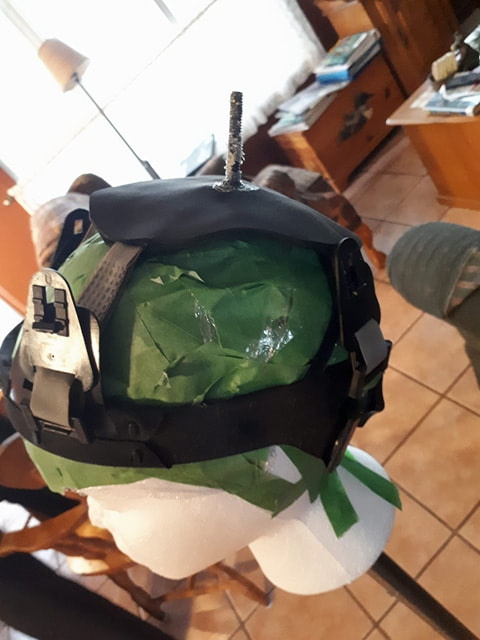
The structure with the added screw on my custom sized wig-head After I realized this structure was working I needed to set it into the wig. It fit perfectly. I lined up the wig to where I wanted the pony tail to start and put a small hole in the top of the wig mesh (not the hair wefts, leave the wefts alone)and did the same with the twist-able screw at base of the hairline. I sewed the entire thing into place where ever I could manage to, especially around the hairline.
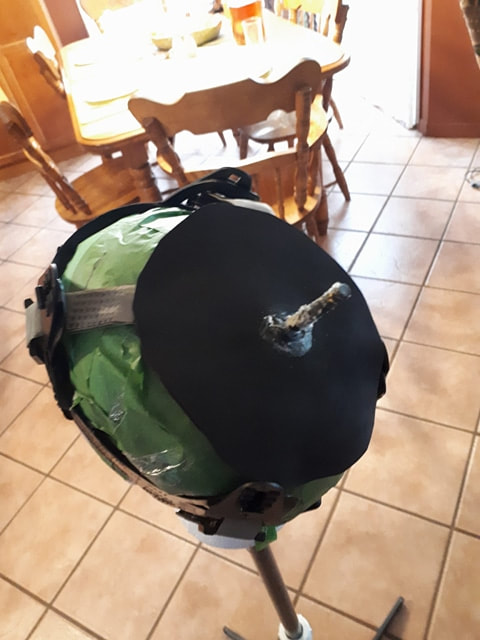
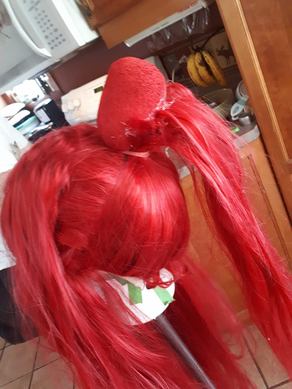
Fitting the head gear into the wig along the hairline, and the screw sitting through it's slit at the back hairline One the structure was in place it was onto styling the wig. First was to create the "nub" of the wig. I used Zeldi's Art's Urbosa Wig Tutorial as my main reference for this section but I will still cover how I did mine as I used my own flair to create it. To create the nub I had to use the screw which was sticking out of the top of the wig. I took a medium sized, red, oval shaped Styrofoam Ball and pushed it into place, removed it, added a lot of glue to the screw, and put it back into place. Once it was dry I started to pull hair up into the nub and glue it into place along the nub. Due to the Jasmine Wig's thick nature I had to do this very slowly and layer by layer. Between each layer I would take a piece of red tulle and glue it on top, which helped keep the wig fibers in place and keep them more secure, as well as kept the nub clean and finished. After each layer was glued I would cut off excess hair that was hanging off the end. These hairs were carefully placed elsewhere as they would be needed for the pony tail itself later.
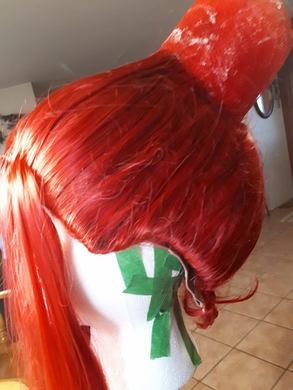
The process (with the visible Styrofoam ball) and the finished "nub" (pre bang styling), back image shows where the adjustable screw for structure tightening sticks out Once the nub was finished it was onto styling the bangs. The Jasmine only has allotted bangs along the center front and the skin tab, so I bought some extra short wefts and sewed some in along the side burn area. Disclaimer; you should probably sew in extra wefts BEFORE pulling the hair back and into place, as I had to weave and sew them into place around the already set hair. Once these were sewn into place it was a matter of cutting and styling all the nag pieces into shape by teasing some volume, then heating, gluing and spraying everything into place. I also sewed in some wefts along the back hairline due to having a natural low hairline on my head, and I didn't want it to all show. On the inside of the wig I sewed in some red bias binding just as an extra measure to make sure my real, very dark, hairline would not show.
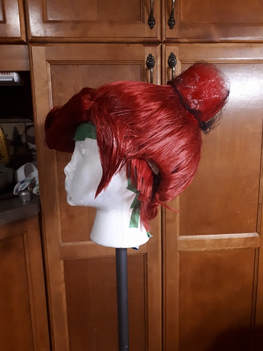
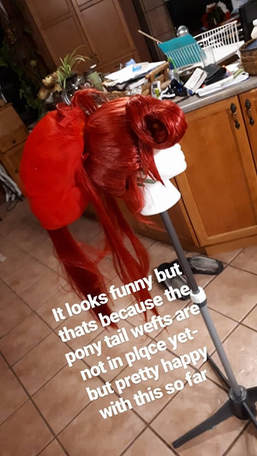
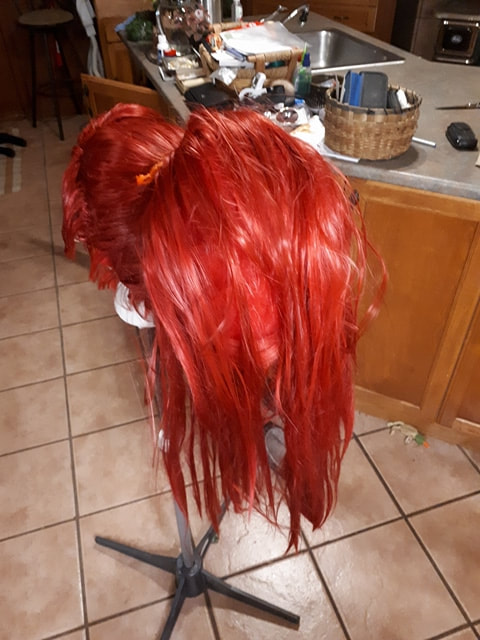
Wig with the sewn in side burn wefts separated from main bangs, and finished wig piece with nub One the main wig and structure was complete it was onto creating the pony tail. Again I used Zeldi's Art's Tutorial to come up with an idea to create this. Just like in her tutorial I made a"pillow case" with a casing, mine being made of red tulle as opposed to red fabric. Along the casing's seams I sewed in more and more of the tulle, in different lengths so that it would have more volume along the casing. Once a ribbon is slipped through the casing it acts like a drawstring, so it ties onto the nub. Once I was happy with the size of the pony tail I sewed some of the short wefts to the bottom of the pillow case, which would act later as the loose section of Urbosa's two-part pony-tail.
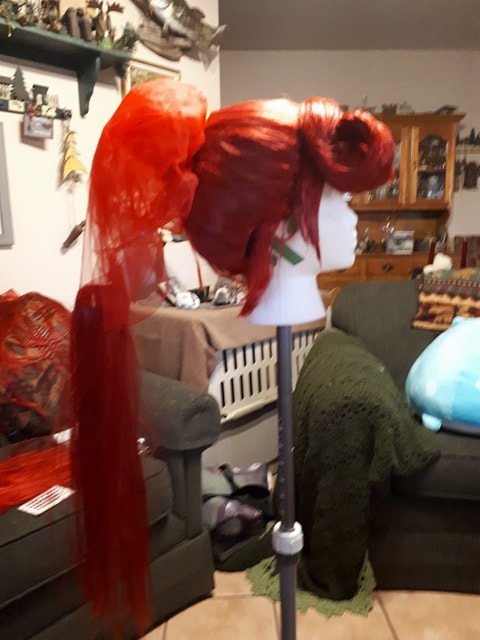
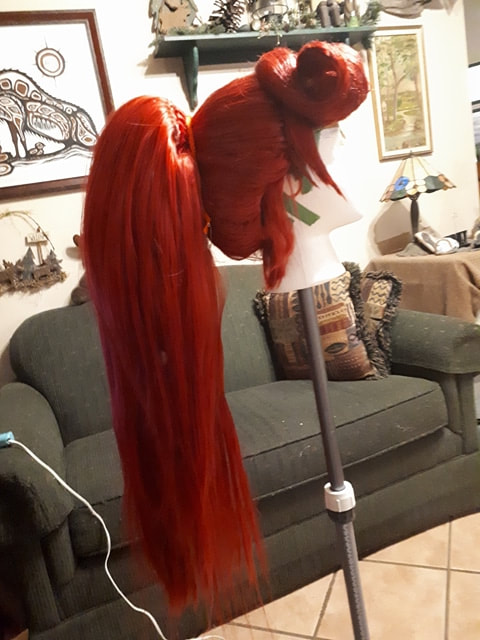
Size test of poof and final poof with one layer of hair sewn into place One I had the desired size and wefts sewn into place it was time to cover the majestic poof in the remaining hair tat I had cut off earlier. To do this I glued the loose hairs into a red bias binding which in turn acted as my own home made "wefts". These were hand sewn along the casing seam and layered into place. I also used the remaining bought wefts as the outer most layer of hair. To help keep everything in place I took some red bias binding and sewed it on top of the weft ends and around the casing to both reinforce and strengthen the casing and keep all wefts and hair fibers in place.
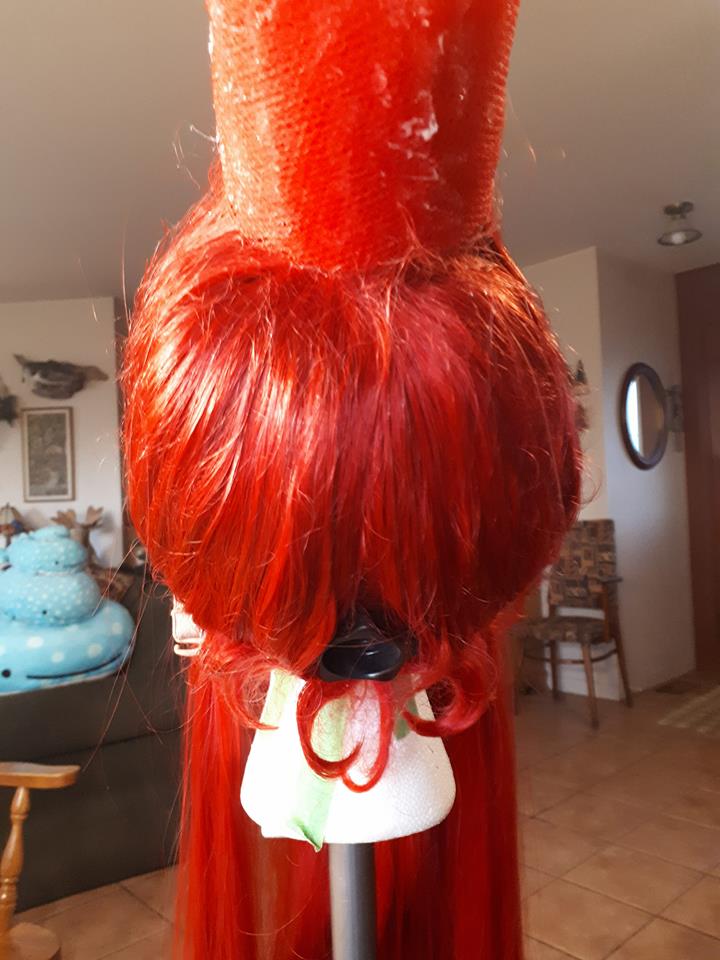
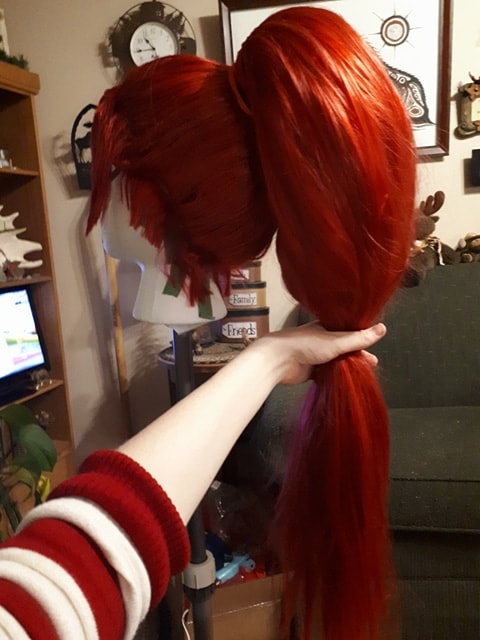
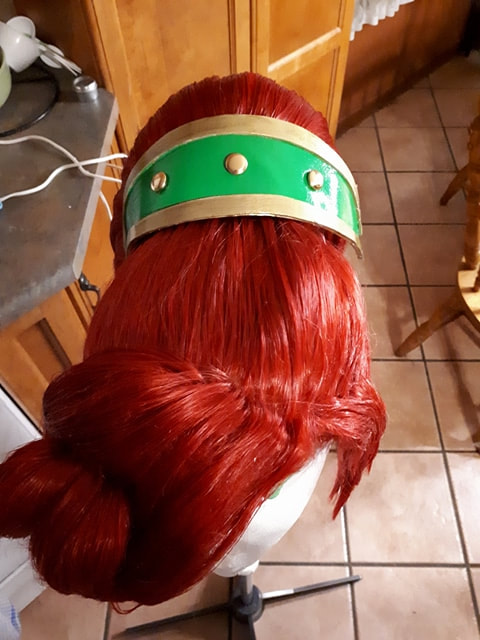
The poof after all the hair was sewn into place and after if was cleaned up a bit After that was all finished and the poof was cleaned up it was a matter of tying the bottom of the pillow case into the second pony tail and gluing the gold detail on top of the hair tie. From there the last piece left was the accessory that Urbosa uses to hold up her pony tail, which I used as a way to cover the "seam" and bias binding where the nub and poof meet. This accessory is made from craft foam and golden buttons that match all the other pieces of this costume. The craft foam was made using a pattern I made after the wig was finished (so I could size it properly) and I used my heat gun to help keep it in it's rounded shape. To hold it to the wig there is red lingerie elastic with red clips at the end of them and it wraps around the pony tail and clips in place, covering everything.
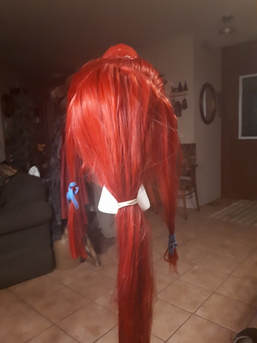
The area where I tied off the pony tails and the hair accessory And that is the basics about how I made an adjustable wig that is easy to take on and off and stays in place without any slipping. The best part of this structure and even the way I made the detachable pony tail is I can take breaks while wearing the costume without completely removing the wig. There were many times at Anime North 2018 where I would loosen the wig through the screw in the back and hold up the wig manually (i.e. with my hand) for a while just to rest from the tightening, or remove the pony tail piece to rest from the weight. The nature of these big wigs styles is that they get heavy and can cause strain on your head, especially if you are not used to wearing heavy things on your head like I am. Being able to take a break from the wig without taking it completely off was wonderful and definitely one of my favorite parts of how I did this.
|
Annie's Costume
|


 RSS Feed
